PBX-specific configuration: Unify OpenScape 4000 via SIP-Trunk
This guide describes how to set up softphone functions (SIP) for ProCall Enterprise via "SIP trunk connection" (SIP system networking) for the Unify OpenScape 4000 telephone system and what you should bear in mind in the process.
| State of knowledge | July 2023 |
|---|---|
| ProCall Enterprise | from V 8.0 |
| PBX | Unify OpenScape 4000 |
| Softphone functions connectivity | SIP Trunk connection |
Configuration of PBX Unify OpenScape 4000
The PBX Unify OpenScape 4000 does not support Registration.
You have to enter the IP address of estos UCServer in trunk configuration.
SIP and RTP transport
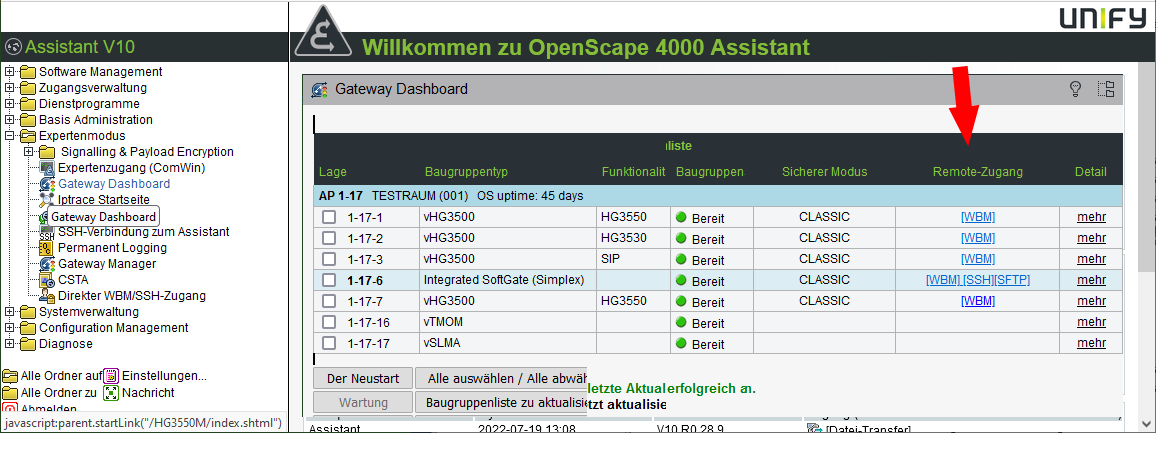
For the connection between PBX and ProCall Enterprise Server shown here, only UDP connections are currently supported.Start the OpenScape 4000 Assistant – Gateway Dashboard
The SIP trunk is set up in the HG 3500. The configuration interface can be started via the "OpenScape 4000 Assistant" – Expert mode – Gateway dashboard.
Sample Screenshot – Unify OpenScape 4000 Assistant – Gateway Dashboard – Remote Access
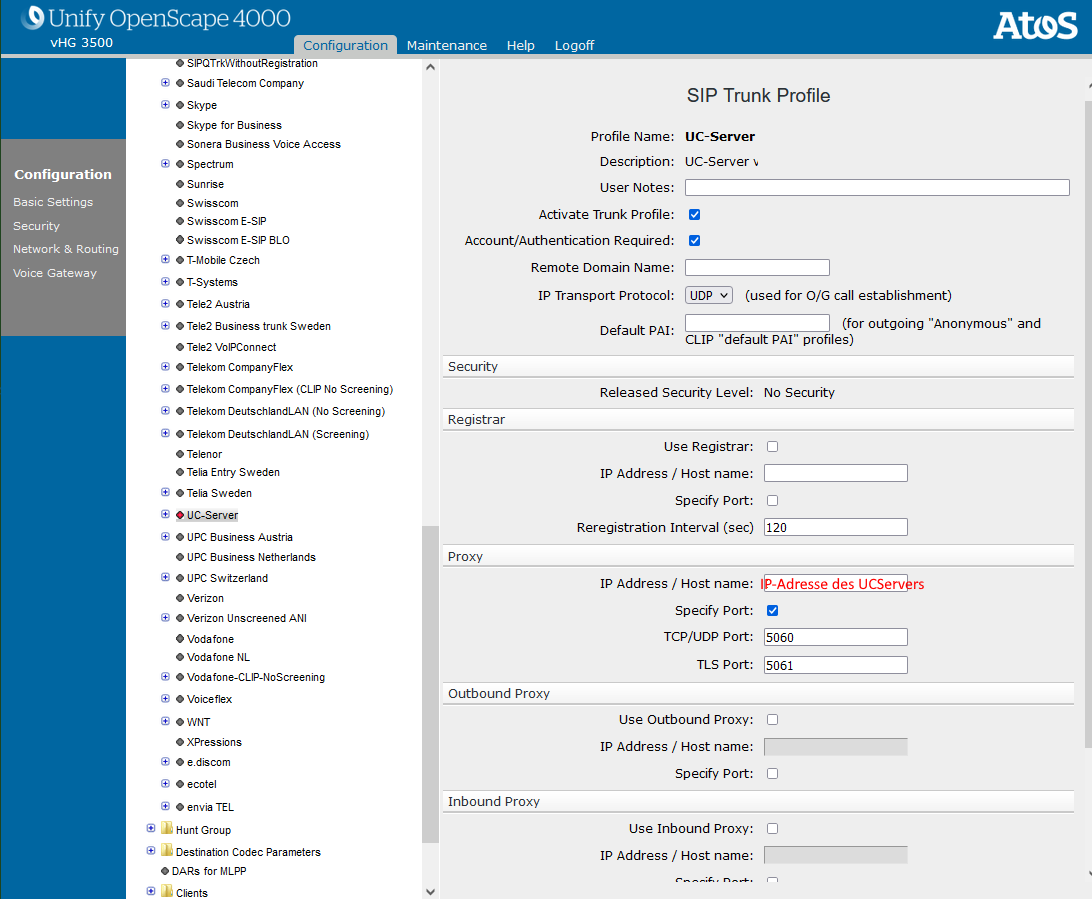
Specify IP address of the UCServer as proxy
In the SIP trunk, specify the IP address of the UCServer as the proxy.
Example screenshot: Unify OpenScape 4000 – SIP trunk profile – IP address/host name: Enter the IP address of the UCServer.
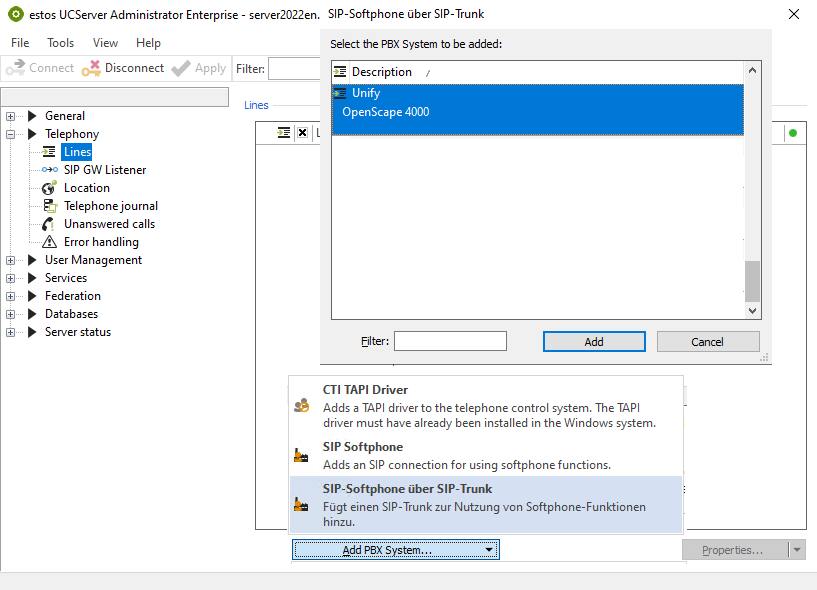
Setup on the UCServer
Add the telephone system via the selection "Add telephone system – SIP softphone via SIP trunk".
Example screenshot – UCServer Administration – Telephony – Lines – Add PBX – SIP softphone via SIP trunk
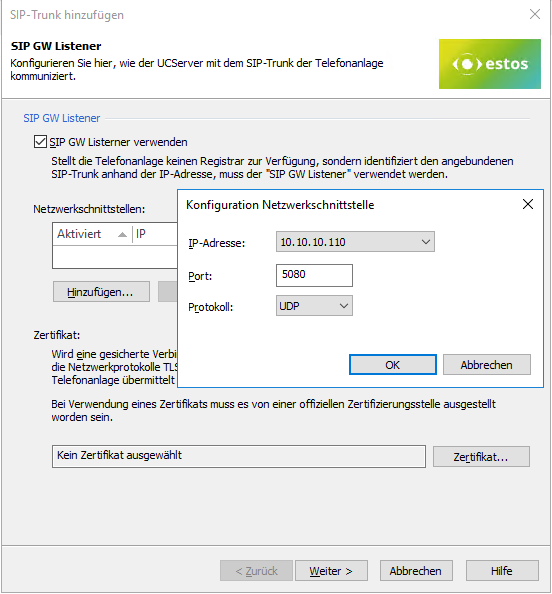
Set IP address and port
The IP address through which the UCServer is to communicate with the telephone system must be specified.
The "Use SIP GW Listener" function must be activated. Select the IP address to be used under "Network interfaces" using "Add" and define the port to be used.
Example UCServer Administration – Telephony – Lines – Add PBX – SIP softphone via SIP trunk – SIP GW Listener
Select the desired communication protocol.
By default, communication takes place via "UDP". If an encrypted connection is to be used, please note that a valid certificate must be stored on the UC server and the telephone system..
Accept the configuration and click "Next".
Enter the IP address of the HG3500 and select the configuration you have set up under "SIP GW Listener".
Example screenshot: UCServer configuration ProCall Enterprise - Add SIP Trunk - Registrar - SIP GW Listener

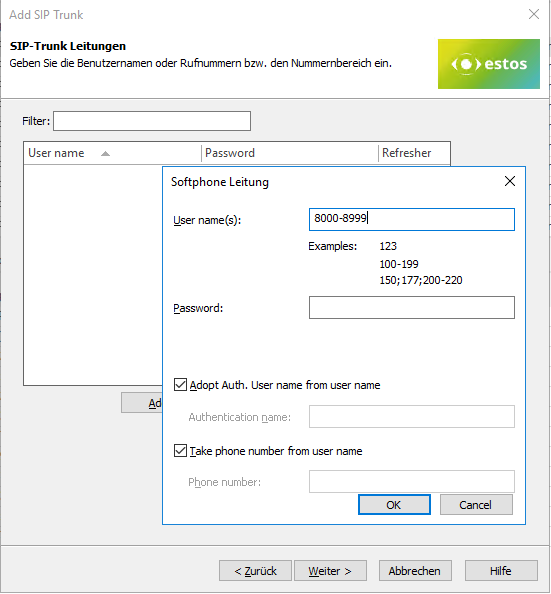
Configure SIP lines for softphones - Create lines for the extension range
In the next step, you can create the lines for the entire extension range .
Example screenshot: UCServer Configuration ProCall Enterprise – Add SIP trunk – Register Softphone – User name and password
Save and apply
After saving and applying the configruatio all lines are shown and activated in the line group.
Version note
Version note
Since estos has no influence on the further development of the supported telephone systems by the manufacturer, we cannot guarantee that the instructions described above will also be fully valid for future releases.
Further informationen
- ProCall 8 Enterprise – softphone functionality (SIP trunk connection as of ProCall 8 Enterprise)
- PBX-specific configuration: Setting up softphone functions (SIP) for Unify OpenScape 4000 – connection instructions (via SIP extension, participant registration)
- Supported telephony functions for ProCall Enterprise with Unify OpenScape 4000