Start-up ProCall integration in Microsoft Teams
May 2025
ProCall 8 Enterprise from Version 8.0
UCServer Installation
Install ProCall 8 Enterprise from version 8.0 as a new installation or update.
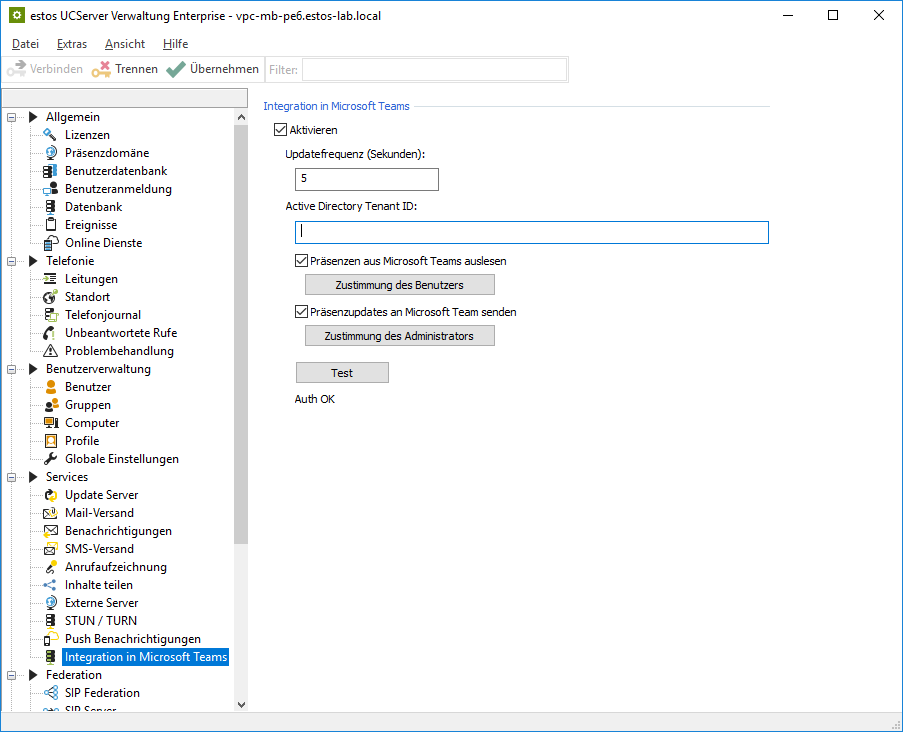
When starting UCServer Administration, a new setting "Services → ProCall Integration in Microsoft Teams" is visible in the tree structure on the left:
Example screenshot – UCServer Administration – Services – Integration with Microsoft Teams
Then switch to the Microsoft Azure Portal to make further settings.
Microsoft Azure Portal
Log in to the Azure Portal.
An Admin-Account should be available for the necessary "Admin consent". Otherwise, this approval can also always be granted retroactively via the Azure Portal.
Determine Tenant ID
Determine the "Tenant ID" of your company using https://docs.microsoft.com/en-us/azure/active-directory/fundamentals/active-directory-how-to-find-tenant
Copy the ID and then switch to UCServer administration.
UCServer management
Enter Tenant ID
Enter the copied "Tenant ID" in "Services → ProCall Integration in Microsoft Teams" in the "Active Directory Tenant ID:" field.
"Auth required" should be visible at the bottom. Now grant the required consents "User consent" and "Admin consent are assigned
- User consent (Read presences) "User consent" button in administration
- Admin consent (Write presences)
- "Consent of the administrator" button in the administration
- or via the Azure Portal
User consent/Service permissions
Since ProCall Enterprise 8.7.1
As of ProCall 8 Enterprise 8.7.1, it is no longer necessary to assign a user consent for the app registration authorisations, but the app registration itself can now receive the necessary authorisations to read the presences ( getPresence) via service permissions .
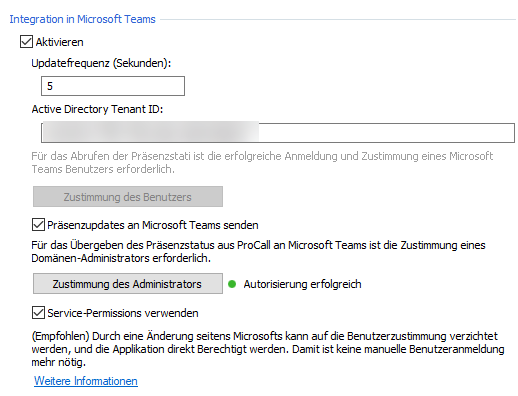
You can activate this feature by ticking "Use service permissions" (recommended).
Example screenshot of ProCall integration in Microsoft Teams - Activate
Up to ProCall 8 Enterprise before 8.7.1 User consent(Read presences) "User consent" in administration
Only necessary before ProCall Enterprise version 8.7.1.
Click on the "User consent" button
- perform the user consent with an Azure AD account
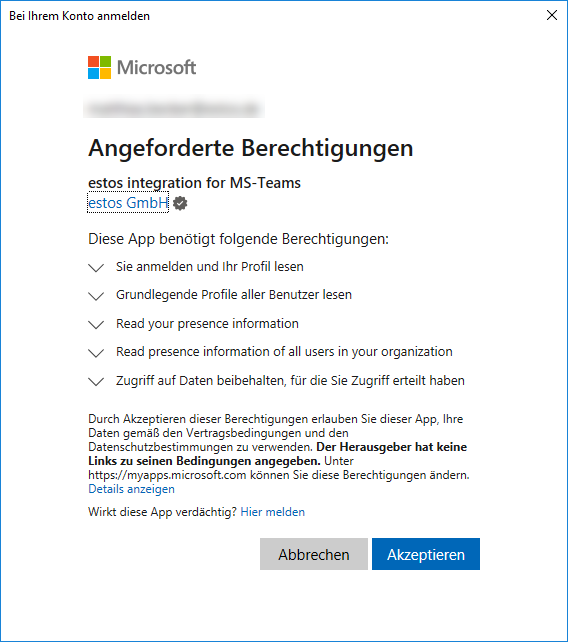
- Confirm the requested authorisations twice
Example screenshot: Grant permission for the app requested in the Microsoft account – "User consent"
By these measures the user consent was given, but the admin consent is still missing.
Admin consent (Write presences) – "Consent of the administrator" for the organization
"Consent of the administrator" button in the administration
Admin consent can be triggered via the UCServer administration. This way you do not have to click through the Azure Active Directory in the browser.
- click the "Administrator's consent" button
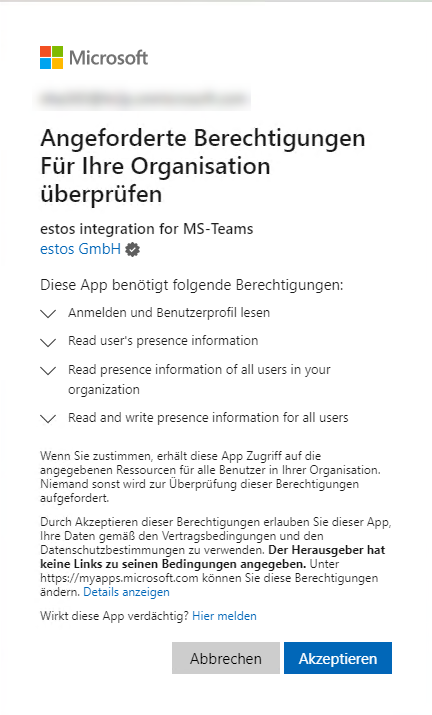
- Confirm the permissions
Example screenshot – Grant permission requested in the Microsoft account for the app – Administrator "Admin consent".
Azure Portal
Log in to the Azure Portal with an account that can grant "Admin consent".
Navigate to "Azure Active Directory → All Applications → Enterprise Applications → estos ProCall Integration in Teams → Permissions
Grant the "Admin consent" (consent of the administrator) via the corresponding button.
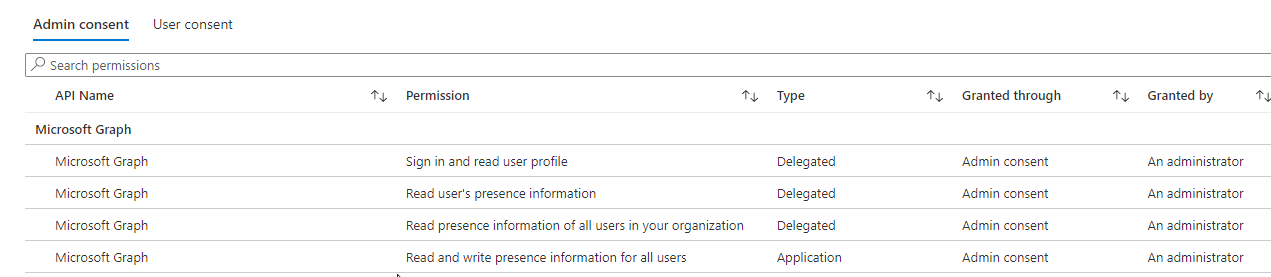
Example screenshot in Azure Portal – API name – Permission – Admin consent
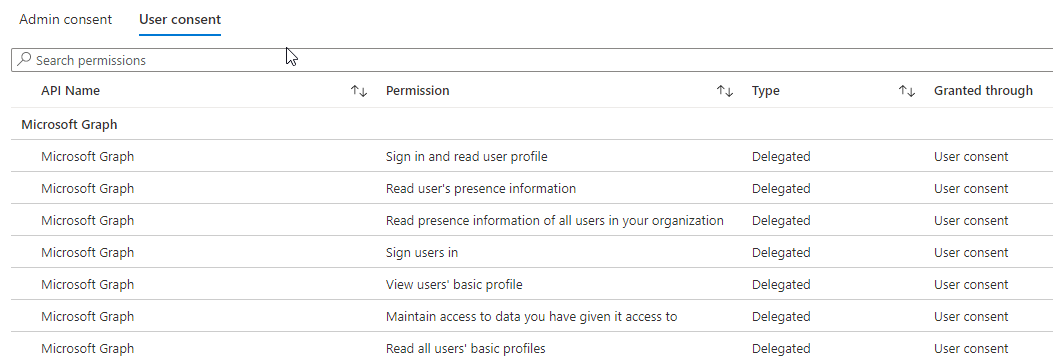
Example screenshot in Azure Portal – API Name – Permission – User consent
Note
In the Azure Portal, there are settings for the company indicating that User consent is not possible at all and can only be made by the administrator: https://docs.microsoft.com/en-us/azure/active-directory/manage-apps/configure-user-consent?tabs=azure-portal#configure-user-consent-settings
In this case, User consent in the UCServer management cannot be performed with any user account, but must be based on the assigned rules for Enterprise Apps in the Azure Portal.
For this reason, and if the same Administrator account is used for User consent and Admin consent, the granted permissions are displayed in the "Admin consent" table in the Azure Portal. The table for the User consent remains empty.
Password changes/expired password
Please note that in case of password changes or for an expired password for the administrator or user account used for Admin or User Consent, the authorization must be reissued in UCServer to ensure functionality.
For example, for passwords that are about to expire, an organizational measure can be taken to reassign the password on the previous working day and renew the admin or user consent in the same process step. In this way, downtime can be reduced to a minimum.
Summary
Permissions – API Permissions – Consent
In order for the UCServer to be allowed to read team users' presences, a so-called "User consent" is required. This can be done centrally from the point of view of a user who has carried out the "User consent" in the UCServer administration.
In order for the UCServer to be able to set the presence of the teams users, a so-called "Admin consent" is necessary. This can be done either via the Azure portal or via the "Admin consent" button in the UCServer administration.
It is nevertheless advisable to view the permissions of the enterprise application "estos ProCall Integration in Teams" in the Azure Portal. Access can also be removed again via this.
UCServer management
Once the required permissions are set, integration with Microsoft Teams can be enabled globally, per group (services) or for individual users (services).
Note that the users in UCServer management and Azure Active Directory must match in username or UPN (user principal name).
From ProCall version 7.3.5 and above, it is possible to create a file in which users are optionally assigned if there is no unique match. Copy this file to the "ExternalServiceProvider" directory in the UCServer installation folder. This list is loaded after activating the Teams integration in the UCServer management.
File name: usermatching.csv
Content (comma separated): Azure AD username,UCServer username
In the example, user Max Mustermann has the UPN "max.mustermann@domain.local" in the UCServer user management. In Azure AD, he has the UPN "mmu@domain.de". Further entries can follow in additional lines.
Example usermatching.csv
mmu@domain.de,max.mustermann@domain.local
lfr@domain.de,lena.frisch@domain.localPlease note that user names in the CSV file are case-sensitive, otherwise they cannot be matched.
Web proxy support
Available from ProCall Enterprise 8.0.1 or 7.6.1.
If a web proxy in the company controls internet traffic, it is usually configured via the proxy settings of the Windows operating system (Control panel → Internet options). However, these settings are stored in the user context, which is why the UCServer service running in the context of the local system account cannot access these settings (the UCServer administrator is running as a user, which is why the proxy settings work here).
This means that you can only tell the UCServer service the settings if they have been saved in the LocalSystem context. You can find instructions on the internet.
You can also specify a proxy for Microsoft Teams presence integration via configuration:
- Stopping the UCServer service
- Editing the file "msteams.cfg" in the config folder of the UCServer installation directory
- Add the line (note json format)
- "u8sProxyAddress" : "PROXY-Server IP:PORT" (z.B. "u8sProxyAddress" : "192.168.1.253:1234")
- Save
- Restart UCServer service
- In the UCServer administration it is then also visible if a proxy has been configured for the teams connection
- UCServer Verwaltung ist dann auch sichtbar, wenn ein Proxy für die Teams Anbindung konfiguriert wurde.
Continue with
Microsoft Teams integration in ProCall Enterprise: How can I use it?
Further information
estos ProCall integration in Microsoft Teams as app or own app registration
Here is how to set up and use the ProCall integration in Microsoft Teams.
estos provides a custom app for this purpose (estos ProCall integration in teams) as a quick and easy way of getting started for customer companies.
If you do not want to use this app, but provide an app registration for the company yourself, proceed as follows:
Use custom app registration
ProCall App für Microsoft Teams