PBX-specific configuration: Unify OpenScape Business via SIP trunk – softphone functions via SIP system networking
March 2024
This guide describes how to set up softphone functions (SIP) for ProCall Enterprise via "SIP trunk connection" for Unify OpenScape Business and what you need to bear in mind.
| ProCall Enterprise | from V 8.4 |
|---|---|
| PBX | Unify OpenScape Business V3 |
| Softphone Functions connection | SIP-Anlagenvernetzung "SIP-Trunk" |
Notes about the estos test environment
The ProCall softphone functions (SIP) were tested in the estos test environment with the telephone system specified above. The following information was used to register the SIP trunk to the UCServer when setting up the telephone system;
Notes about Codecs and UDP connectionsVerbindungen
To connect SIP lines to the UCServer, the telephone system must support the SIP protocol with codec G.711 a-law.
Optional: Codec Opus and G.722: HD Voice / HD telephony with ProCall Enterprise SIP Softphone functionality
Only UDP connections are supported.
Notes on setting call forwarding and pickup Rufumleitung und "Ruf heranholen" im UCServer
During testing, the "Set call forwarding" and "Pick up call"/pickup functions were carried out by the UCServer (standard).
Setting up the PBX Unify OpenScape Business Trunk
The Unify OpenScape Business does not support registration.
In the trunk configuration the IP address of the estos UCServer must be specified.
Starting the OpenScape Business Assistant - Telephony expert mode
The Unify OpenScape Business V3 SIP Trunk must be activated as Native SIP Trunk and the IP address and port of the UCServer must be specified in the element.
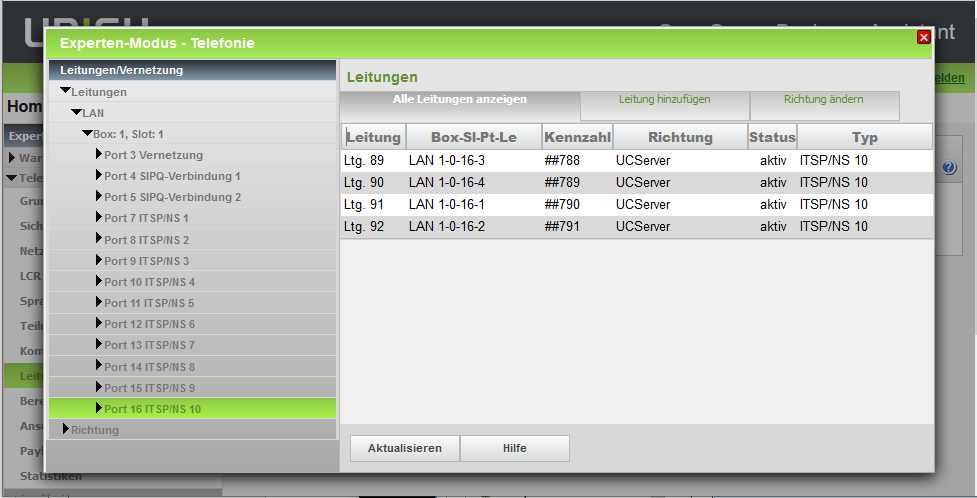
Open the "OpenScape Business Assistant" in Expert mode and navigate to "Telephony - Voice Gateway".
Example screenshot: Unify OpenScape Business Assistant - Expert mode - Telephony - Native SIP server trunk UCServer - Activate trunk and enter UCServer IP address and port

For the functions call forwarding, pickup/forwarding, conference etc. two lines are required in each case.
Make sure that sufficient ports/lines are assigned to the trunk so that users can use these functions.
Configuration of the UCServer
The settings are made in the UCServer administration under Telephony - Lines :
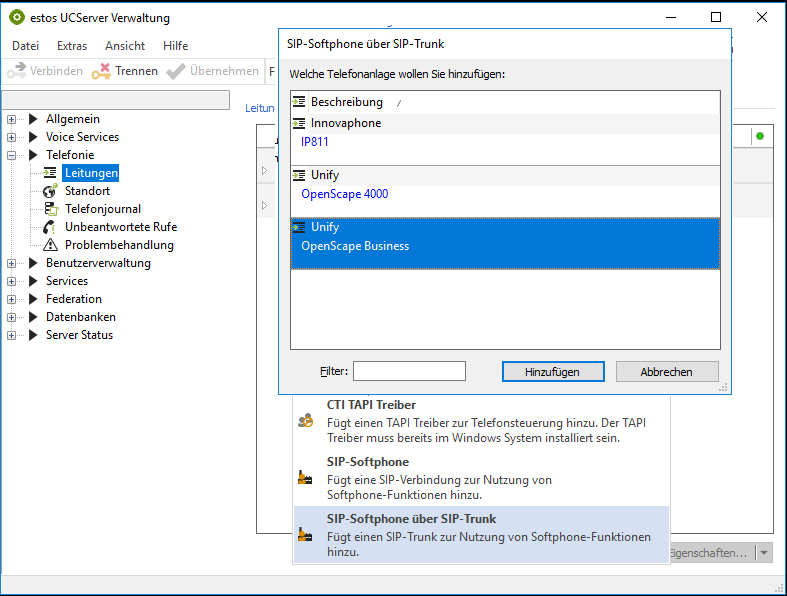
Use the selection "Add telephone system - SIP softphone via SIP trunk" to add the telephone system .
Example screenshot - UCServer administration - Telephony - Lines - Add telephone system - SIP softphone via SIP trunk
Set IP address and port
The local IP address for communication between UCServer and telephone system must be defined.
The function "Use SIP GW Listener" must be activated. Select the IP address to be used under "Network interfaces" by means of "Add" and specify the local port to be used.
Example UCServer Administration - Telephony - Lines - Add telephone system - SIP softphone via SIP trunk - SIP GW Listener
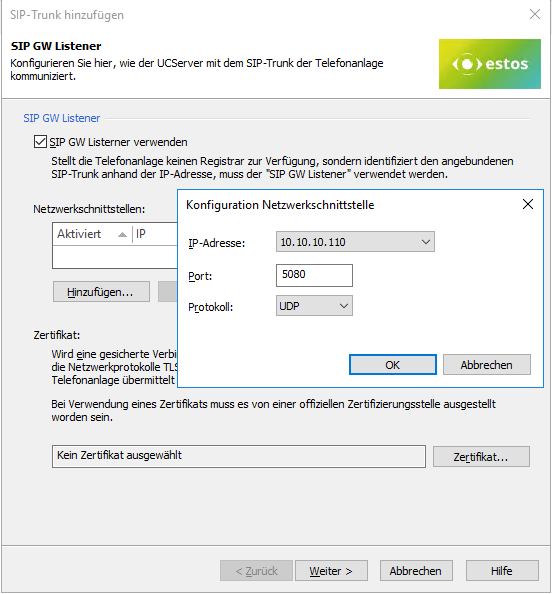
Select the desired communication protocol .
By default communication takes place via "UDP".
If an encrypted connection is to be used, please note that a valid certificate must be stored on the UCServer and the telephone system.
Accept the configuration and click on "Next".
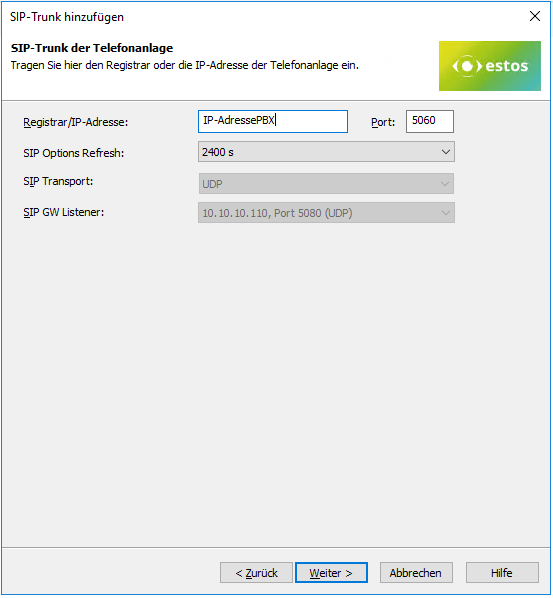
Enter the IP address of the OpenScape Business .
Example screenshot: UCServer configuration ProCall Enterprise - Add SIP Trunk - Registrar - SIP GW Listener
Configure SIP trunk lines for softphones - Create lines for the extension range
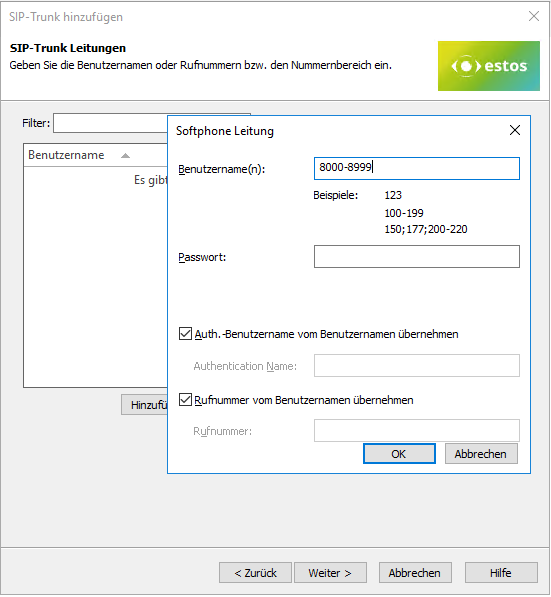
In the next step, the lines for the entire extension range can be created.
Example screenshot - UCServer administration ProCall Enterprise - Add SIP trunk - Softphone registration - User name and password
Save and apply
After saving and accepting the configuration, all lines are displayed and activated under the line group.
Version info
Since estos has no influence on the further development of the supported telephone systems by the manufacturer, we cannot guarantee that the instructions described above will also be fully valid for future releases.
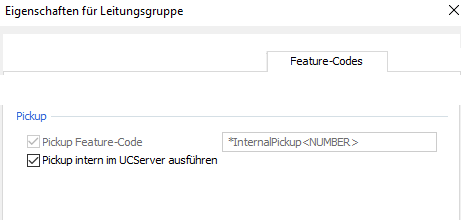
Pickup via UCServer
(from ProCall Enterprise V 8.3)
We recommend, that Pickup be executed internally in the UCServer (default setting)
This allows the UCServer itself to pick up a call, which provides improved functionality and does not require call group management within the PBX.
Retrieval via feature code has not been tested and is not officially supported.
Example screenshot: Properties for line group - Feature codes - Configure pickup
