ProCall Voice Services – setting up end devices
October 2025
ProCall Voice Services support a range of end devices, which can be connected via a cloud provisioning service. The end devices require permanent access to the internet.
Note the port shares required to access the internet.
If the ProCall Voice Services are used in an installation in your own network, the end devices can be integrated into ProCall via estos ECSTA for SIP Phones.
In ProCall NEX, the connection is set up automatically .
The telephone sets can be integrated into estos ECSTA for SIP Phones in ProCall.
General information
Basically, auto provisioning automatically gives the phones the following properties:
- SIP account (registration of the phone at STARFACE)
- Access data to protect the telephone configuration (see below)
- Function keys
- Language files
- STARFACE user menu for the telephone display
- Firmware updates
Please note that the first time a phone is provisioned to the PBX, the entire configuration is transferred, including the passwords for the following items:
- SIP account (registration of the phone at STARFACE)
- Telephone menus
- Phone web interface
Please note
In order for the end devices to be used with estos Voice Services and for the Voice Services functions to be available,:
- The end device must be set up in the UCServer
- The end device must be assigned to a user object
- At least 1 phone number must be assigned to the end device.
- The end device must be reset to factory settings. (so that the standard provisioning server is in the configuration again).
Make sure that the new firmware is installed on the end device. Otherwise, the Voice Services functions will not be available.
Provisioning of end devices
The end devices for automatic provisioning can be entered in the UCServer Administrator in the "Voice Services – End devices" menu.
After the MAC address has been entered in the UCServer, the end device must boot with factory settings (i.e. reset to factory settings, or in the case of a new device, take it out of the box and start it).
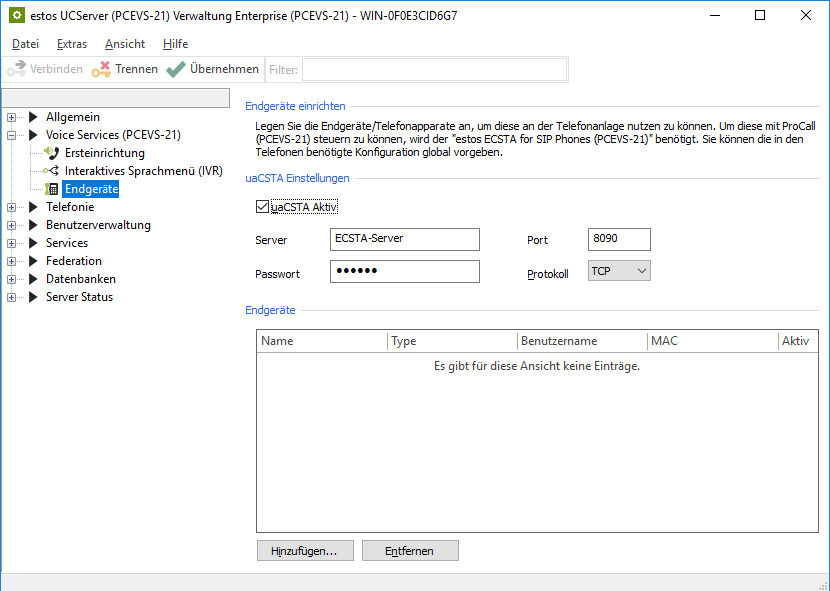
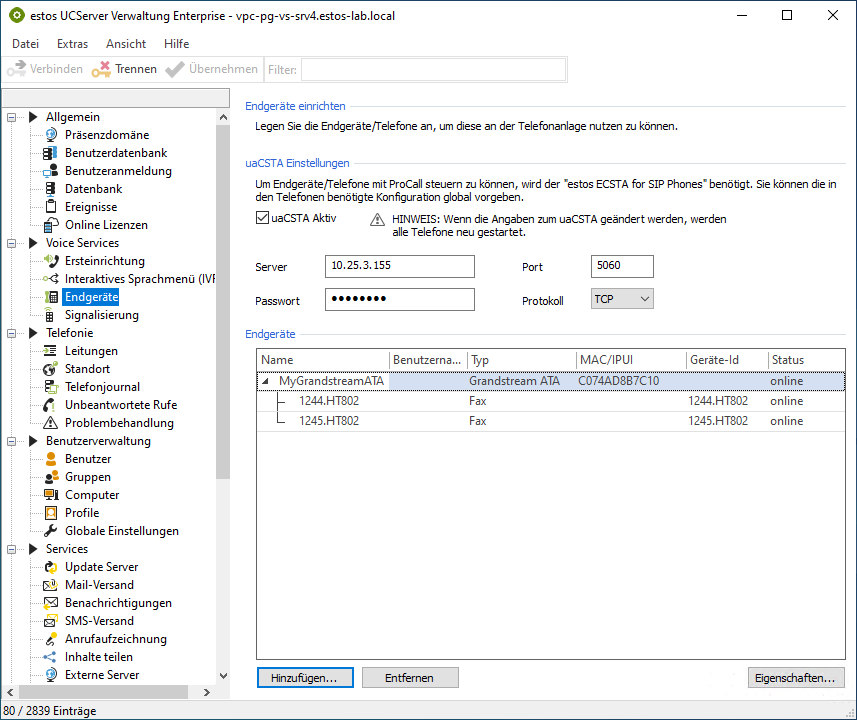
uaCSTA settings
If you have installed an estos ECSTA for SIP phones, you can enter the required connection data for the phones using the profiling function.
Please note that the address and port of the uaCSTA server that can be reached from all end devices must be specified as the "Server". The password for the login, which you have defined in the uaCSTA server under Telephone connection, must be entered here.
Example screenshot: UCServer Administration – Voice Services – End devices – uaCSTA settings
End devices
Snom and Yealink
Click "Add" to register a new device.
Assign a Name for the device. The name of the device can be freely selected and is displayed when it is assigned to a user object. The Name cannot be changed once the device has been added.
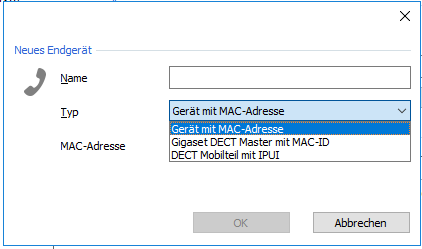
Select "Device with MAC address" as type, enter the MAC address of the end device and click "OK".
Example screenshot: Add New End device – Type
By "Accepting" the entered devices, the information is transferred to the provisioning service.
The end devices receive new firmware and the software to use the available settings.
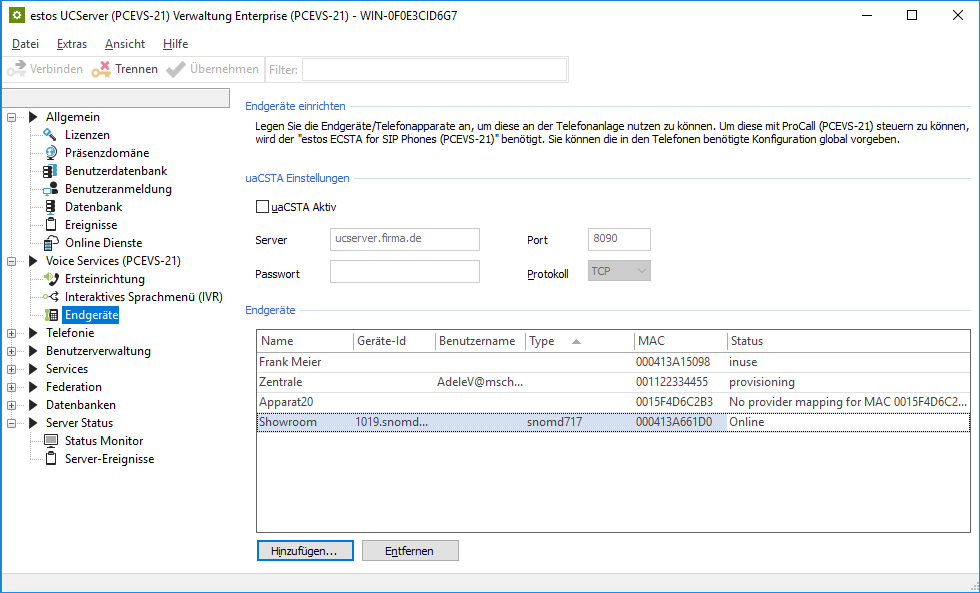
The overview shows to which user the end device has been assigned and the status of the end device.
Example screenshot: UCServer Administration – Voice Services – End devices
DECT systems
Gigaset DECT System
The first step is to set up the DECT Master. In the next step, the handsets can be added.
Click "Add" to register a new device.
Assign a name for the device. The name of the device can be freely selected and is displayed when it is assigned to a user object. The Name cannot be changed once the device has been added.
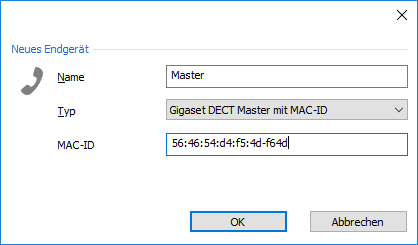
Select "Gigaset DECT Master with MAC ID" as Type, enter the MAC ID of the station and click "OK".
Example screenshot: Add new terminal – Master – Type "Gigaset DECT Master with MAC-ID"
The DECT master must be restarted once after it has been entered in the UCServer.
After successful provisioning (status = online), the handsets can be added.
Click "Add" to register a new device.
Assign a name for the device. The name of the device can be freely selected and is displayed when it is assigned to a user object. The Name cannot be changed once the device has been added.
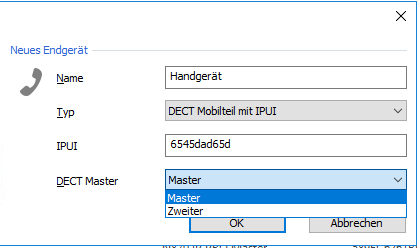
Select "DECT Handset with IPUI" as the Type and enter the IPUI of the handset. Select the desired DECT Master and click "OK".
Example screenshot: Add new terminal – Handset – Type "DECT Handset with IPUI"
The handsets added in this way are automatically entered in the DECT Master and managed there.
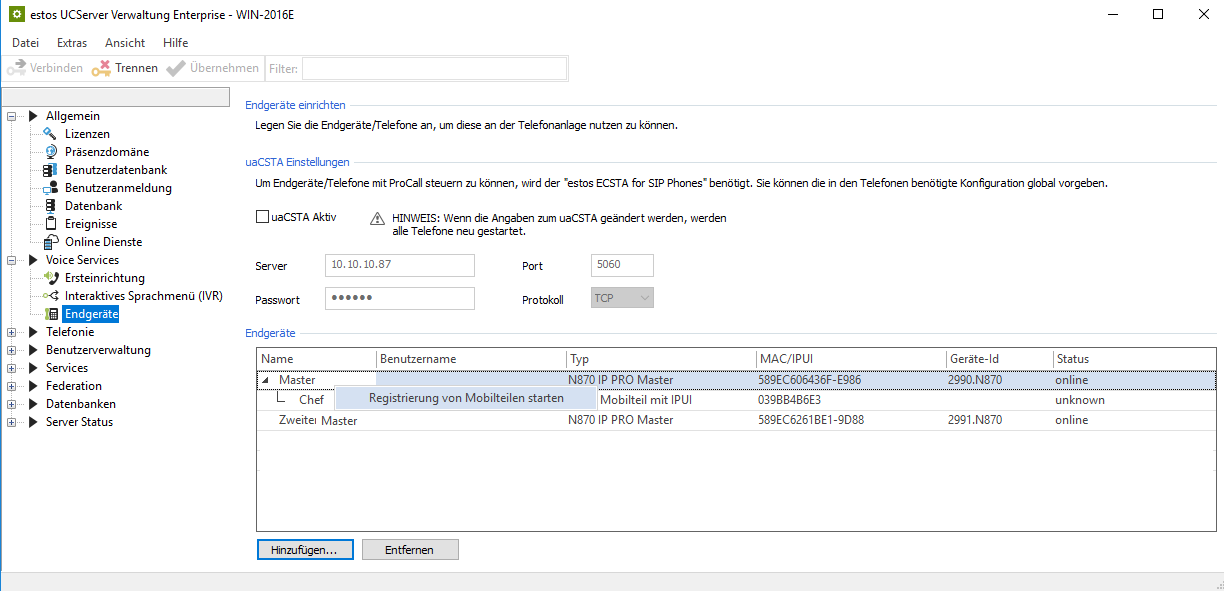
In the next step, the handsets must be registered in the DECT system. You can set the system to "Login mode" via the context menu on the corresponding master.
Example screenshot: UCServer Administration – Voice Services – End devices – Log on – Start handset registration
The handheld devices can now be registered.
Analague telephone adapter (ATA)
Grandstream
Click "Add" to register a new device.
Assign a name for the device. The name of the device can be freely selected and is displayed when it is assigned to a user object.
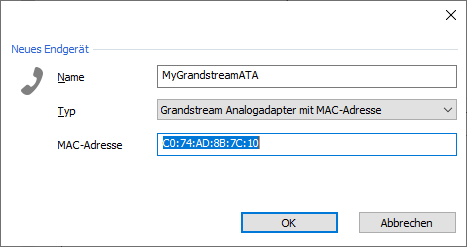
Select "Grandstream analog adapter with MAC address" as type, enter the MAC address of the end device and click "OK".
Example screenshot: New end device - ATA name - Type - Mac address
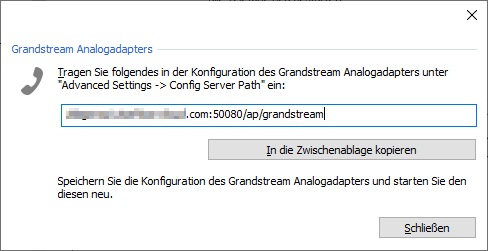
The following window displays the URL that must be entered for provisioning on the ATA:
Example screenshot: Grandstream analogue adapter configuration data
Please ensure that the ATA carries out provisioning via HTTP. This must also be set on the ATA.
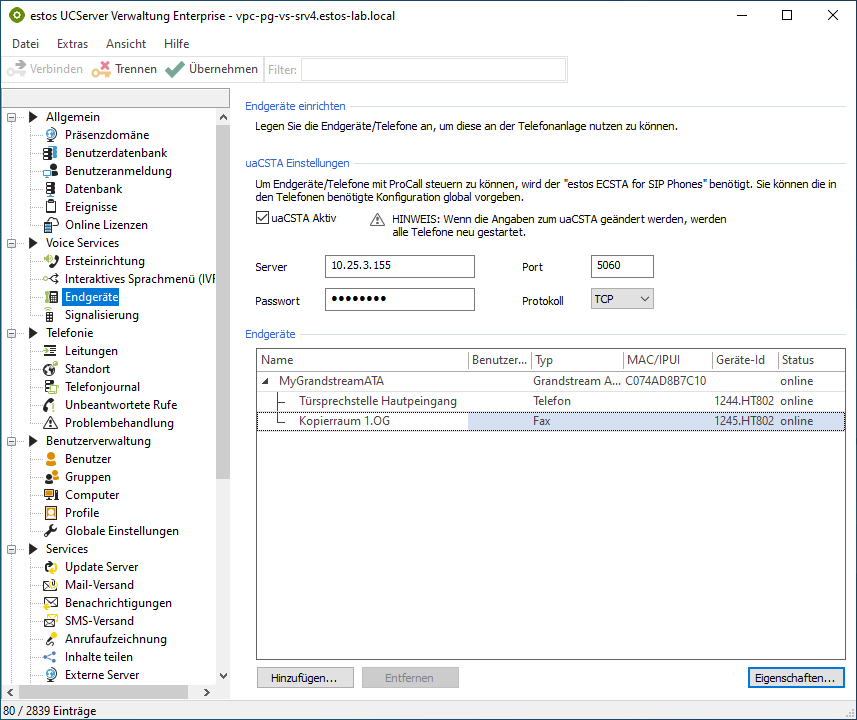
Subsequently, the ATA is displayed in the UCServer as follows.
After the URL has been entered in the ATA on the web interface, the ATA has been restarted and has registered with VoiceServices, the individual analog ports are displayed in the UCServer administration under the ATA.
Example screenshot: UCServer Administration - Voice Services - End devices - Name, User name, Type: Grandstream ATA, MAC/IPUI, Device ID, Status
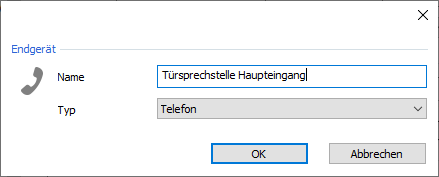
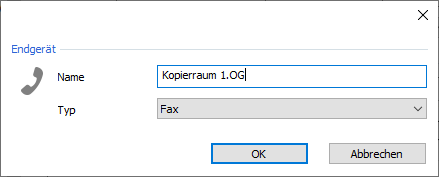
Afterwards, the name and type can be configured in the properties of a port.
For a fax please select the type "Fax" and for a telephone (e.g. a door station) please select the type "Telephone".
Afterwards, the ports can be assigned to an end user.
For fax, for example, a fax service user is recommended: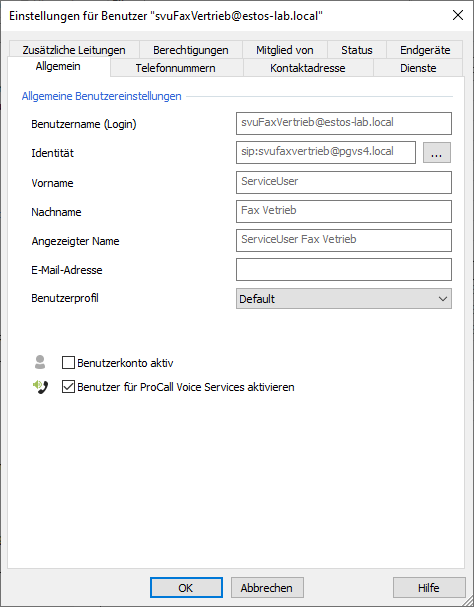

Special case door intercom
If you use an analog port of the ATA to operate a door intercom, this port does not have to be assigned to a user. As soon as the port is in operation and you connect a door intercom, it can make internal telephone calls but cannot be called (externally)..
Status display
The following statuses can be displayed:
| Status | Meaning |
|---|---|
| Online | The end device has been successfully provisioned and logged on to the telephone system. |
| Offline | The end device has been provisioned successfully, but has not been logged on to the telephone system. |
| Provisioning | The Mac address/UID has been successfully sent to the provisioning server. |
| MAC address already registered | The entered MAC address already exists on the provisioning server. To provision the end device again, it must first be deleted. |
| Error received from phone provider | The MAC address / UID could not be passed to the provisioning server. Contact estos support. |
| Error registering device | Error when registering the end device to the PBX. If a new registration of the end device is not successful, please contact estos support.. |
| No provider mapping for ...“ | There is no provider for the provisioning of the end device |
| unknown | The status is unknown. Errors during provisioning are currently only displayed as long as the "End devices" window is open. |
Assign end devices to users
If the end device is registered in the UCServer, it can be assigned to a user.
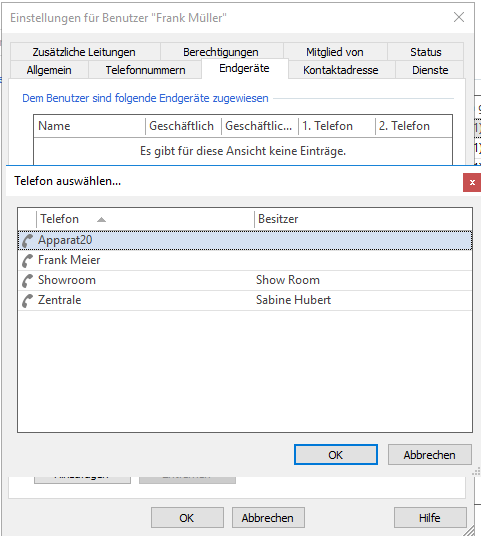
Click the "Add" button on the "Devices" tab and select one of the available devices.
Example screenshot: UCServer Administration – Voice Services – End devices – Add – Assign end devices to user
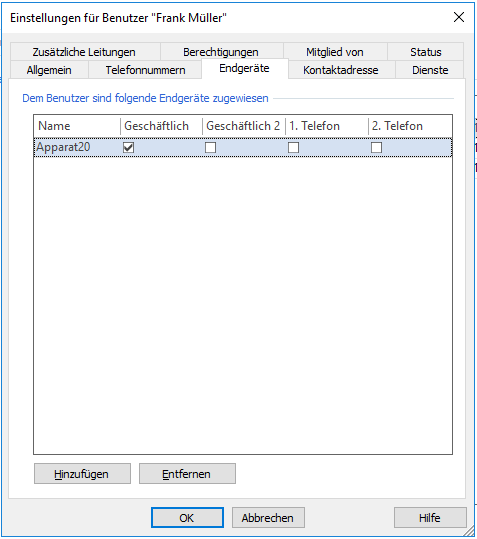
Next, you can specify which of the phone numbers assigned to the user should be assigned to the end device.
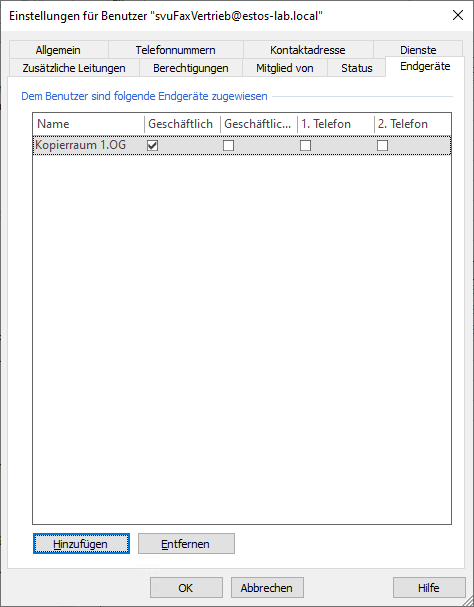
Example screenshot: UCServer Administration – Voice Services – End devices – Add – End devices are assigned to the user
Save the selection and (re)start the end device after accepting the settings.
Access data to the end devices
Snom
| Web interface | Device | ||
|---|---|---|---|
| User name: | admin | Admin PIN: | 0000 |
| User password: | 0000 | Base web password: | 0000 |
Yealink
| User name: | user | Admin name: | admin |
|---|---|---|---|
| User password: | user | Admin password | admin |
Gigaset Pro
Device | User name | Password |
|---|---|---|
| Gigaset N870 IP Pro | admin | N-870_admin! |
| Gigaset N670 IP Pro *1 | admin | N-670_admin! |
Grandstream
Grandstream | |
|---|---|
| Admin password: | admin |
| User password | 123 |
Version info
| *1 | from ProCall V. 8.3.0 |
Further information
ProCall Voice Services - overview