PBX-specific configuration: Setting up softphone functions (SIP) for reventix – connection instructions
June 2020
| ProCall 7 Enterprise | V 7.0 |
|---|---|
| Cloud PBX reventix | June 2020 version |
Notes on the estos test environment
The softphone functions (SIP) of ProCall were tested in the estos test environment with the telephone system specified above. The tests were performed with a maximum of two lines per SIP end device. The information described here was used during the setup of the telephone system for the login/registration of the individual SIP lines to the UCServer.
UDP connections
Only UDP connections are supported for the connection of SIP lines.Add participant
The SIP line set up for ProCall is set up under menu item: Telephone system – Extension.
Extension type
The extension must be created as a "Telephony/video extension".
Example screenshot: Booking extension
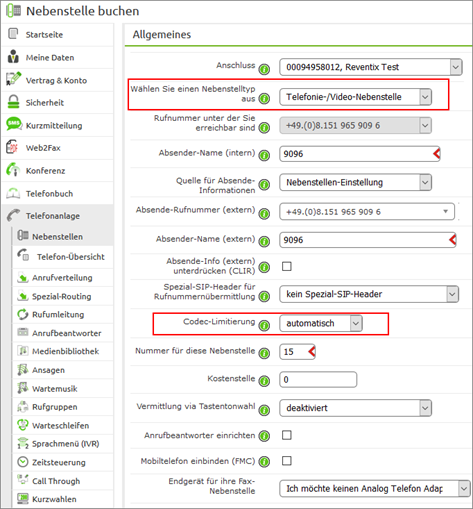
Codec limitation
Under Codec limitation "automatic" must be selected for ALL extensions.
After creating the extension, the required access data can be displayed:
Example screenshot: General – access data
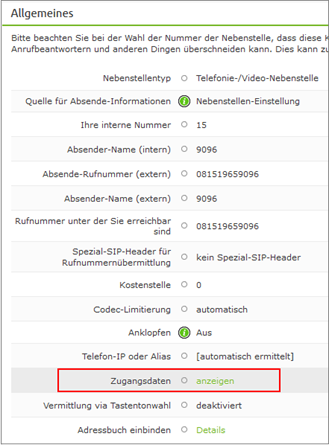
For the connection to the estos UCServer, the server address as well as the extension user ID and the extension password are required for each SIP line.
Example screenshot: Extensions user ID and password

Configuration of the UCServer
The settings are made in the UCServer administration:
Add telephone system
Enter the connection to the telephone system as "SIP softphone" with the type "reventix" under "Lines".
Example screenshot: UCServer Administration – Add PBX – IP Softphone – reventix

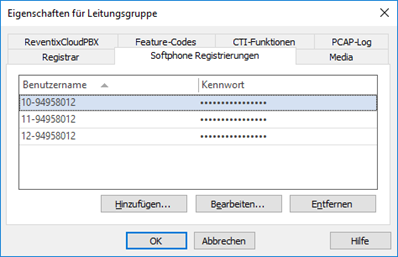
Properties for line group
Add all SIP lines in this connection setting here.
Example screenshot: Properties for line group – softphone registrations
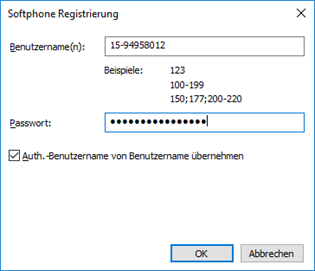
Softphone registration
To connect to Reventix's Cloud PBX, enter here:
Username: "Extension user identification"
Password: "Extension password"
Example screenshot: Softphone registration – username, password
After all SIP lines have been entered in the UCServer, the phone numbers in full canonical (+49...) format must be entered manually for each line.
Configure phone numbers
Set up location
Set up a suitable location in the "Location" with the information on exchange codes, area code, system call number and extension range.
Switch to Telephony – Lines and open the Properties of the line group
Example screenshot: Line group reventix CloudPBX

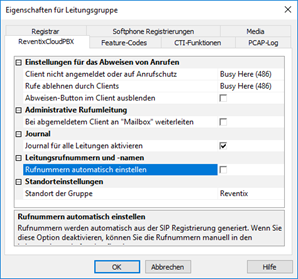
Go to the "<Your telephone system>" tab and
- deactivate the option: "Set phone numbers automatically".
- select the previously created location
Example screenshot: Properties line group line numbers and names
Confirm with OK and accept the setting in the UCServer Admin.
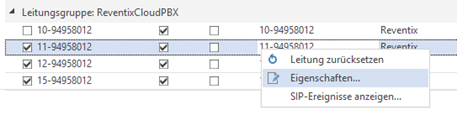
Now open the Properties of each line group in turn.
Example screenshot: Properties line group reventixCloudPBX
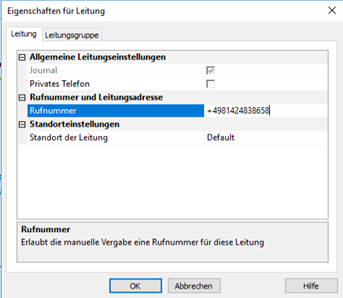
For each SIP line, enter the complete phone number
as in the following format example:
+49814248384569
Example screenshot: Properties for lines – phone number
Confirm with OK.
When all phone numbers are entered, apply the settings in the UCServer Admin.
Version note
Since estos has no influence on the further development of the supported telephone systems by the manufacturer, we cannot guarantee that the instructions described above will also be fully valid for future releases.