Best practice: Activating and setting up services via UCConnect
June 2025
Productive operation
- Create UCConnect account
- Create account
- Verify account
- Connect UCConnect account to the UCServer
- Activate licence for productive operation or test operation
UCConnect Konto erstellen
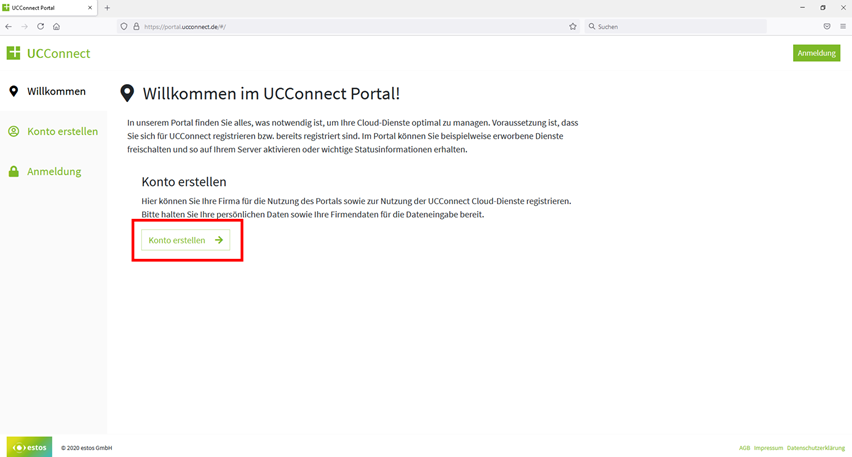
To do this, go to the following website: https://portal.ucconnect.de/ and select the Create account function.
Example screenshot: Create UCConnect account
Activate services
Go through the wizard and select "Activate services" at the end.
You will be taken to your server account.
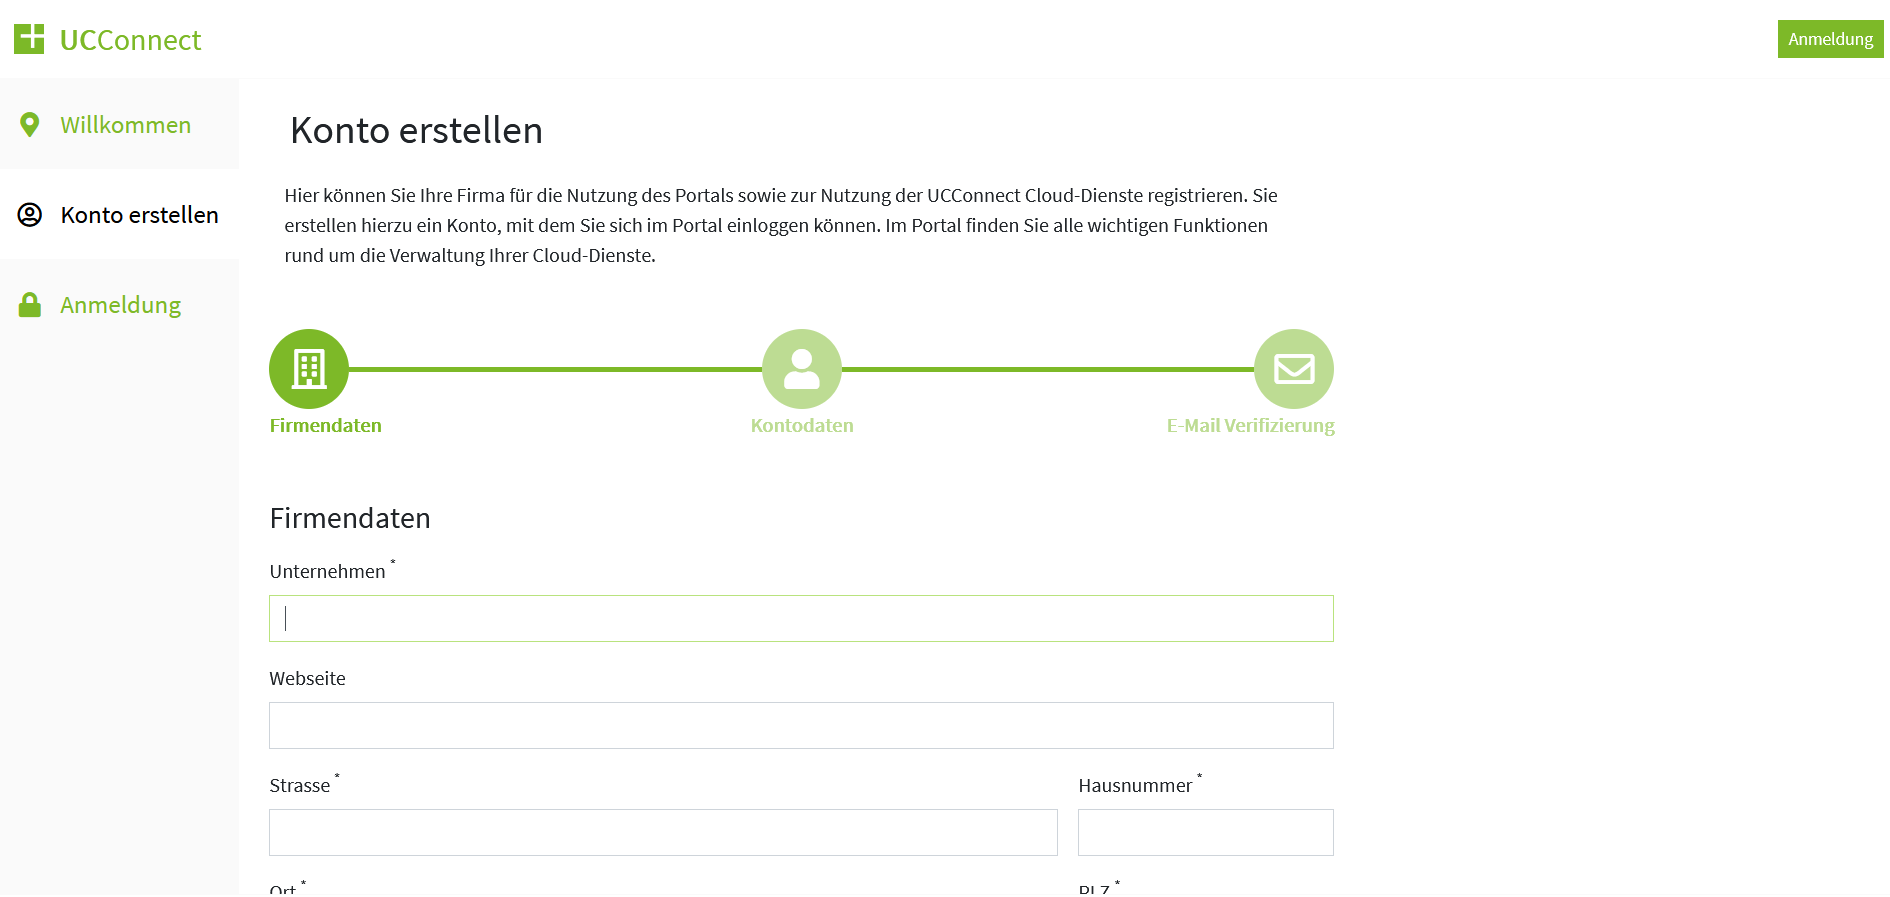
Example screenshot UCConnect - Create an account - Enter company data
Verify UCConnect account
Verify your UCConnect account.
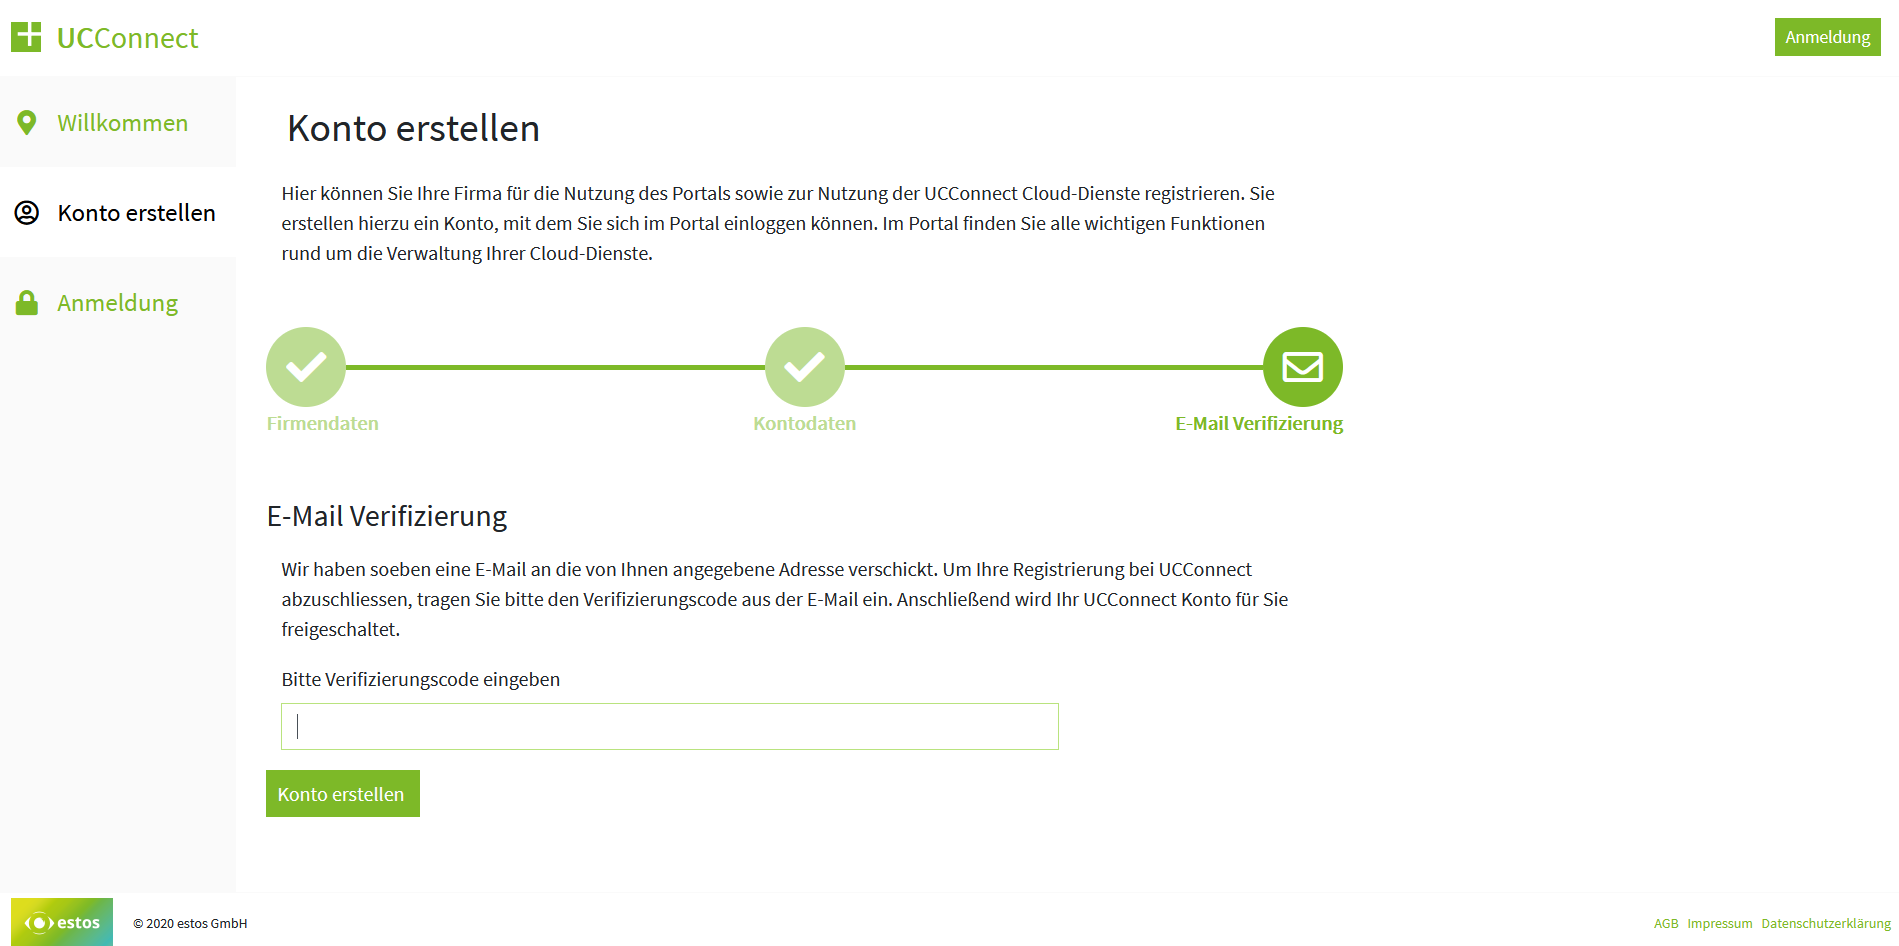
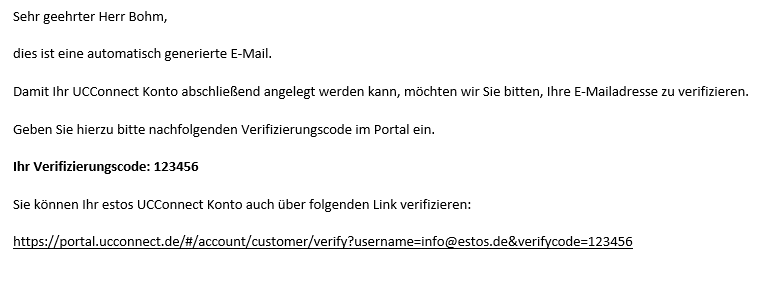
After you have created a UCConnect account, you will receive an automatically generated email with a verification code. This code is required to verify your UCConnect account.
Example screenshot of UCConnect - verify your account
Example screenshot: E-mail confirmation with verification code
See also: Resend invitation email for user accounts
Activate licences
Activate the desired full or test licence under Licences.
Add-on licences for ProCall Mobility Services, ProCall Meetings etc. are transferred directly to the UCServer.
Information on setting up ProCall NEX can be found under Commissioning ProCall NEX
Connect UCConnect account with the ProCall 8 UCServer
Install the estos UCServer and enter your UCConnect account during the installation .
Example screenshot: estos UCServer Setup: Connect with UCConnect - ServerID and password

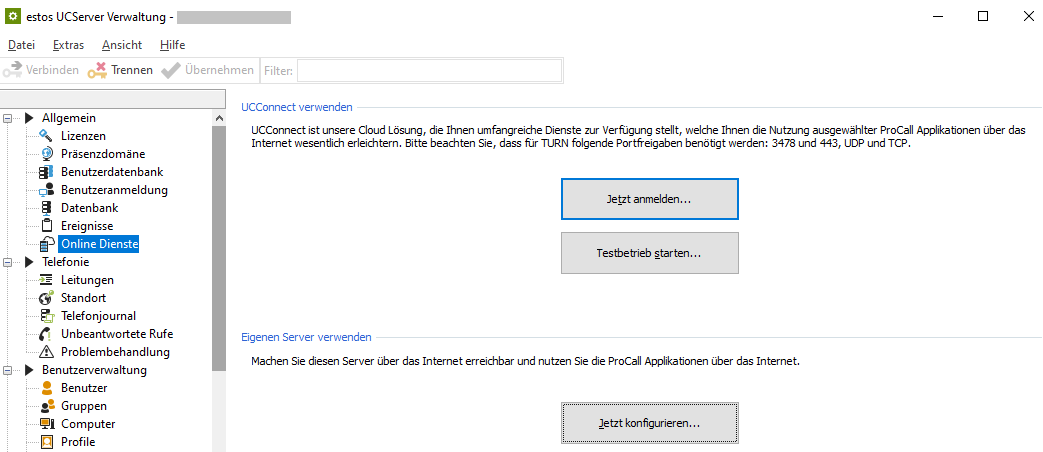
For subsequently changing the UCConnect account , open the UCServer administration → Online services → Use UCConnect → Log in now
Example screenshot UCServer administration - Online services - Register now
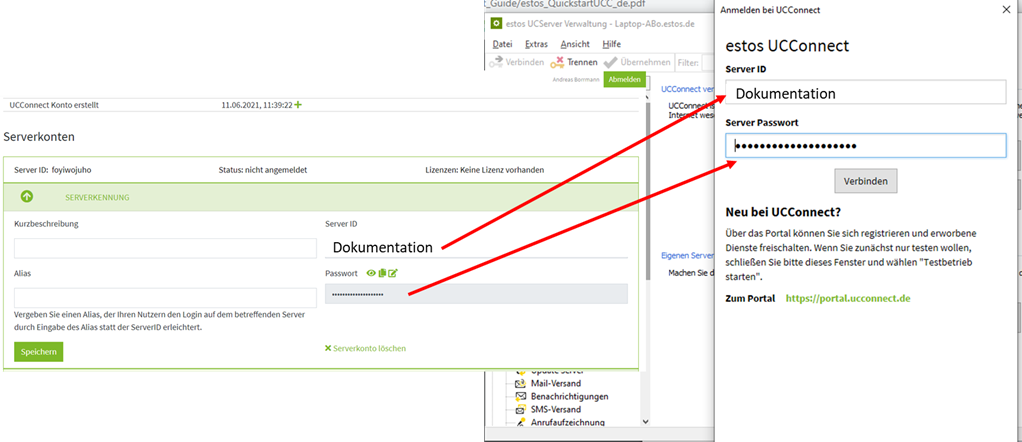
Enter UCConnect server ID and password
Enter the UCConnect server ID and password in the field in the UCServer for the connection to UCConnect.
Example screenshot: Log in to UCConnect - enter server ID and password
Test operation
All services can be used free of charge for a limited trial period.
You can apply for a one-off test licence for all services offered in the corresponding UCConnect account.
The test period is 30 days for ProCall NEX and 45 days for ProCall 8 and add-ons.
If you wish to extend the test period, please contact your estos account manager or send an e-mail to info@estos.de.
Example screenshot: Activate test licence in UCConnect - Enter activation key

Finished
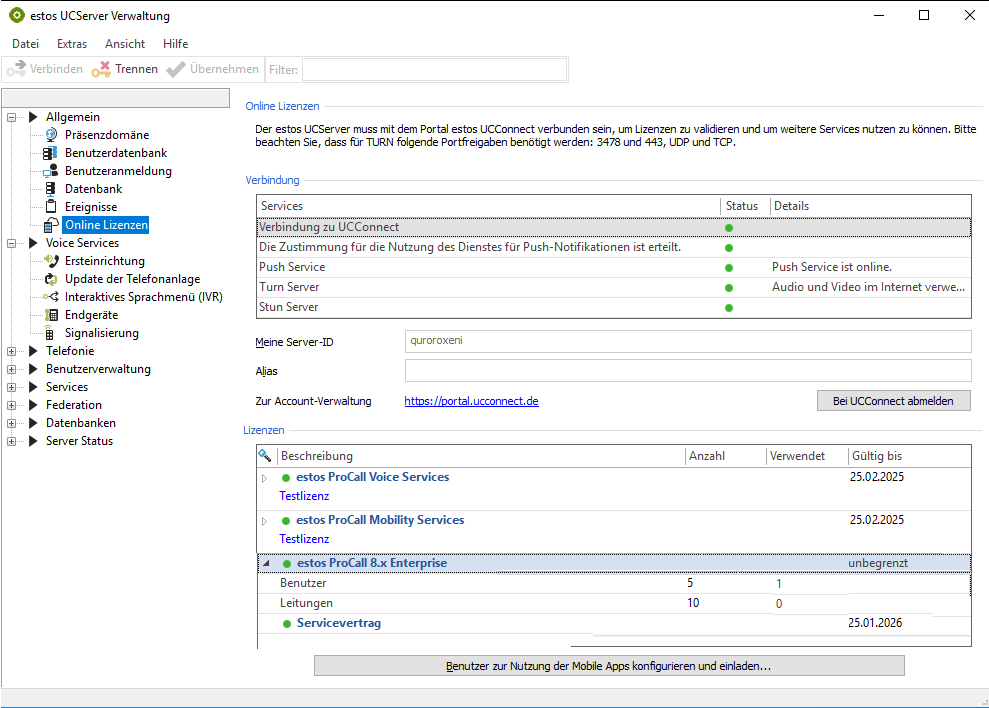
Your UCServer is now equipped with all test licences and you can access the service offering .
Example screenshot UCServer administration - General - Online licences
ProCall Mobility Services - App Enablement
About the UCServer administration
Invite user
Select "Configure and invite users to use the mobile apps " under the Online services menu item.
Send e-mails
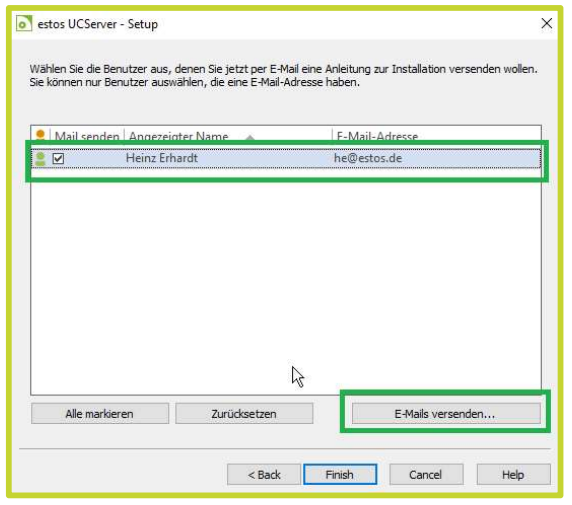
Specify the users who are to be invited to use the app and click on "Send emails".
Example screenshot: UCServer Setup - Send e-mails with installation instructions to users
User: Open email, download app and log in with password
Users call up the email on their smartphones and download the app from the respective shop; the link to the shop is included in the email.
The email contains another link with all user-specific login information. Users only need to retrieve this from their smartphone with the app installed and log in with their password.
The password corresponds to that of the UCServer user.
User login autonomous
Users can also log in via the app login.
App downloaden
Downloadthe app from the relevant store
Name: ProCall Mobile
Enter login details
Fill in the following input fields
- Username
- Password
- Activate UCConnect
- Enter the UCServer ID or alias of the relevant server account.
Notification service
When you create a UCConnect account, you can be automatically informed by e-mail about expiring licences.
This service can also be activated retrospectively for an existing account.
Activate
Activate this under (1) Manage account via the checkbox ![]() under (2) E-mail notification.
under (2) E-mail notification.
Example screenshot: UCConnect e-mail notification
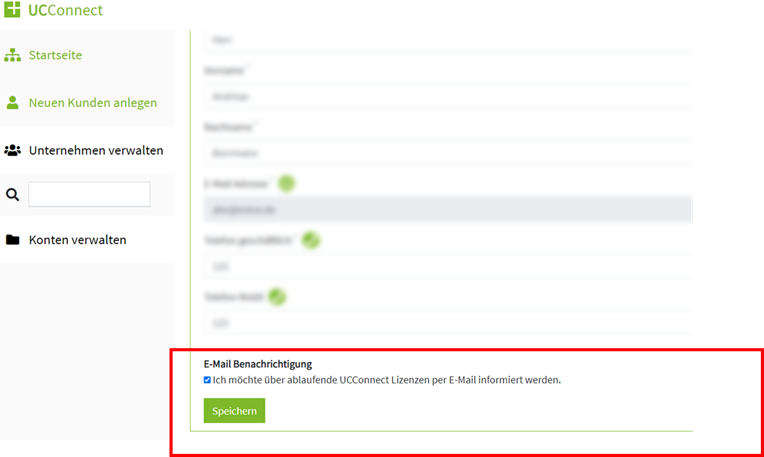
If e-mail notification is activated, the customer account and, if applicable, the dealer account will be notified before the licence expires
- First notification four weeks before the licence expires
- Second notification one week before the licence expires
- Third notification one day before the licence expires
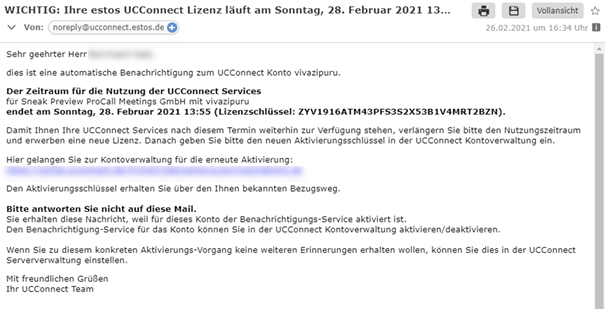
The e-mail informs the UCConnect user about the expiring licence:
- Server account
- Expiry date
- Unbound licence key
Example e-mail about the expiry of a UCConnect licence
Deactivate
If the licence has already been extended with another licence or the service is no longer being used, you can deactivate the notification service for this licence:
To do this, select the desired licence under Licences → go to the menu and activate/deactivate the notification service.
Example screenshot: Select licence and deactivate notification
