Self-hosting of ProCall Web – Setting up a web server using Microsoft Internet Information Services (IIS) as an example
July 2026
ProCall Web (Preview)

Sample installation instructions; this is not intended to be exhaustive or up to date
Please note that for self-hosting of ProCall Web (deployment on your own systems), among other things, a fully functional web server is generally required, which must be set up and operated by the customer at their own responsibility and requires the customer to have the relevant knowledge, infrastructure and authorisations.
As this is a third-party component that is not operated or provided by estos , we cannot accept any responsibility for the completeness or accuracy of the following description.

The information presented here does not give rise to any entitlement to support from estos (Gamma Customer Service) .
Versions used
Microsoft Internet Information Services (IIS) Version 10.0.14393.0
on Microsoft Windows Server 2016 Version 1607 (Build 14393.8783)
Prerequisite
Please take care to meet the requirements listed here: Self-hosting of ProCall Web - Deployment on the customer’s own systems
Procedure
Installation and deployment
Managing roles and features in Microsoft Windows Server
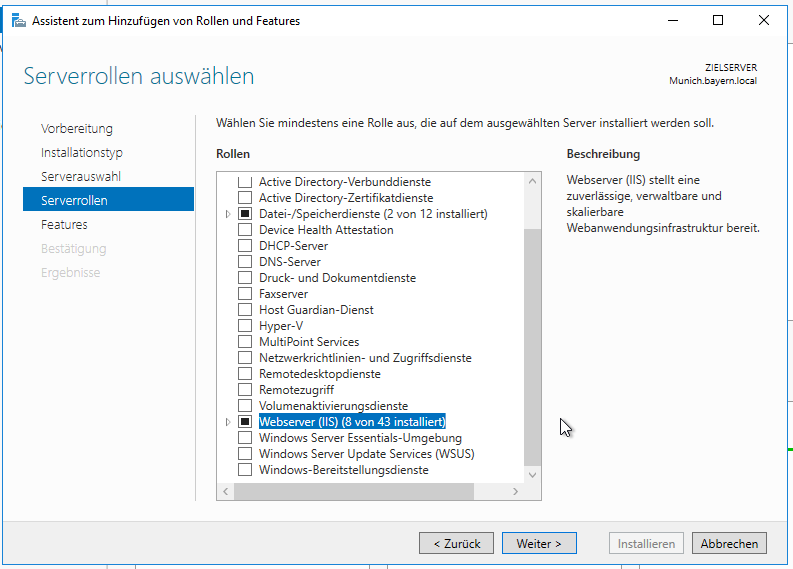
As a prerequisite, IIS must be added via Manage Roles and Features in Windows Server. (No further configuration is added in this example)
Screenshot example: Wizard for adding roles and features – Select server roles – File storage services – Web server (IIS)
Set-up/Configuration
"Internet Information Services (IIS) Manager" via the Windows Start menu
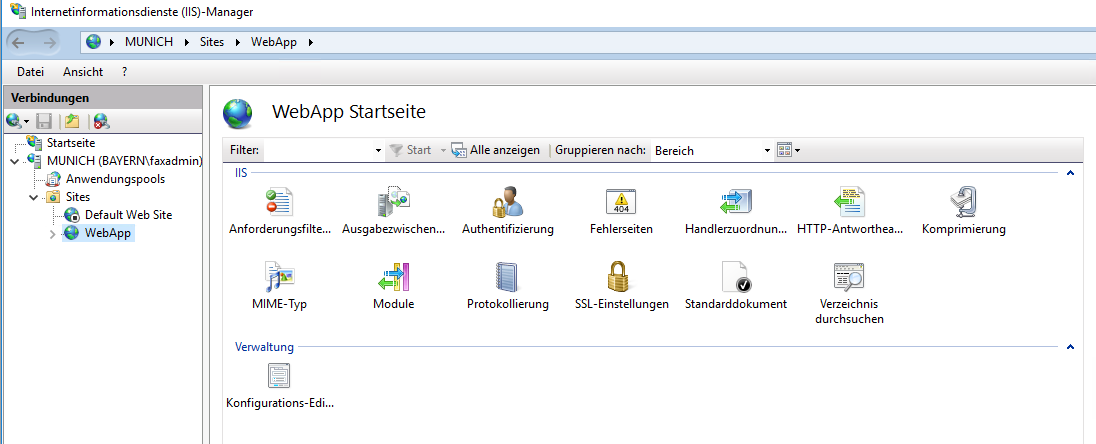
Once the installation/deployment is complete, you can open and configure the "Internet Information Services (IIS) Manager" via the Windows Start menu.
Example screenshot: Internet Information Services (IIS) Manager – Connections – Sites – WebApp

Geneally, the Default Web Site can be stopped or disabled.
Add site
Next, a new site is added via the "Sites" section.
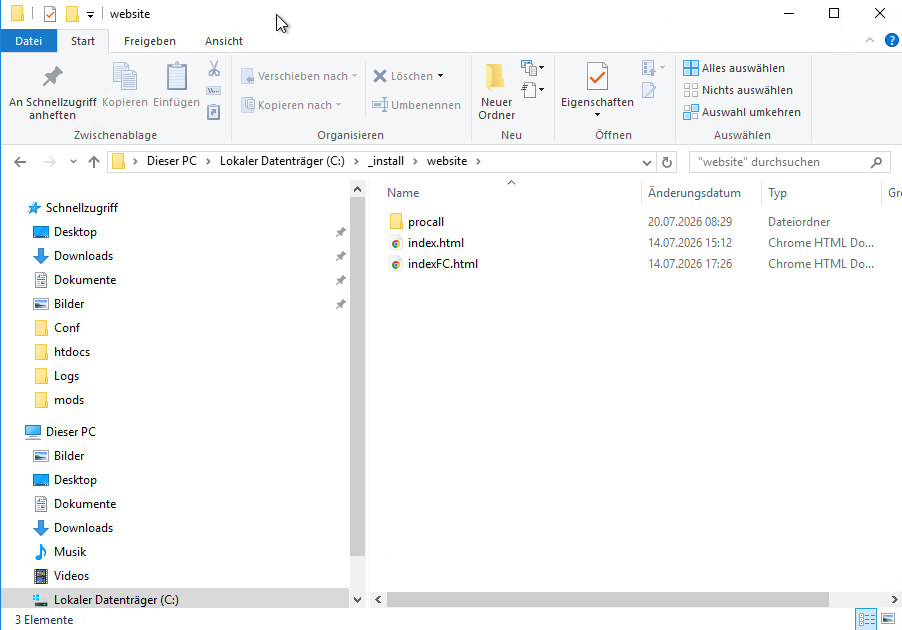
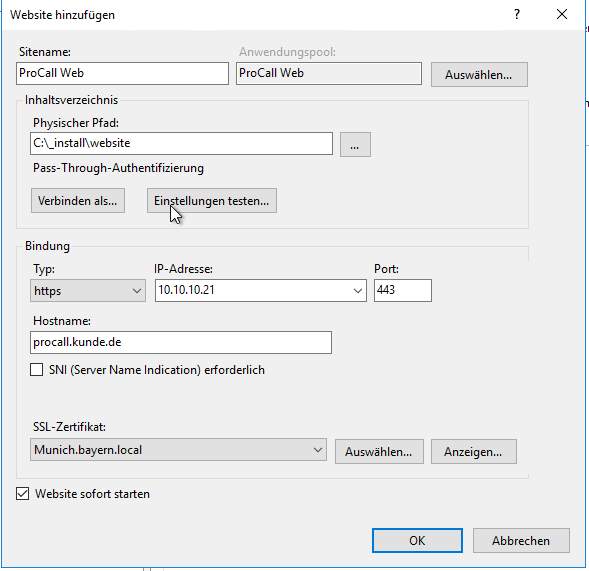
Enter a descriptive name and specify the physical path where the contents of the provided .zip file are located.
The contents of the folder should look like this:
Example screenshot: File – Local Disk (C:) – _install – website – procall
Mapping to the server’s IP address – ports
The following recommendation applies to the binding in the web server configuration:
- Protocol: HTTPS
- Port: 443
- IP address: an IP address of the server on which the service is to be accessible
SSL certificate for HTTPS connections
For HTTPS connections, an SSL certificate is required, which should be configured both in IIS and in the ProCall UCServer web service.
No self-signed certificates
Self-signed certificates do not work here.Sample configuration: Add website ProCall Website Name - Physical path - Binding - Hostname - SSL certificate
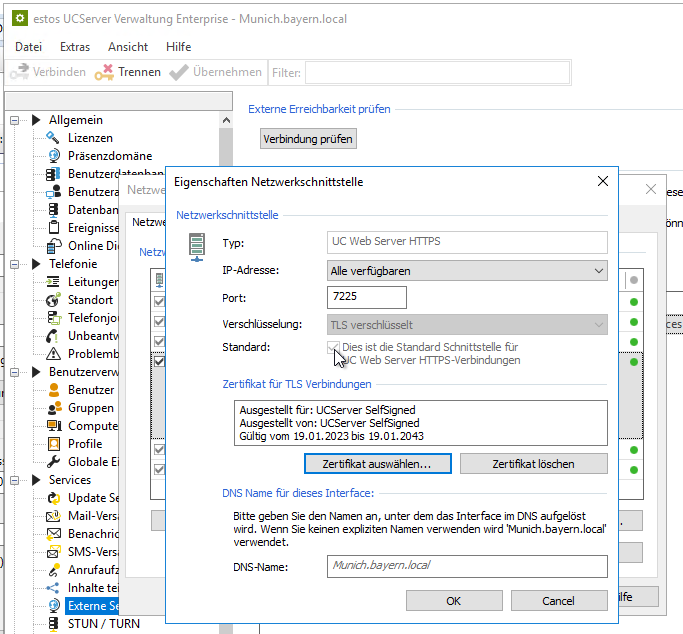
Enter the certificate under the network interfaces of the UC Server for the "UC Web Server https" as well:
Example screenshot: UCServer Administration – Services – External – Network Interface Properties – Select Certificate...
Open and edit config.json
Next, open the "config.json" file from the "procall" directory and customise the configuration to suit your system.

Example config.json
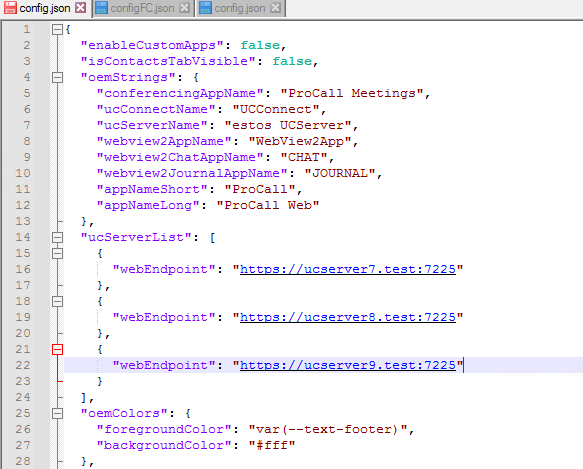
The parameters in config.json are explained here: Self-hosting ProCall Web – Deployment on the customer’s own systems#configjsonDescriptionofconfig.json
Update to a newer version of ProCall Web
Exchanging files via the physical path
If a more recent .zip file for ProCall Web is available, you will need to replace the files in the physical path.
Further information
Self-hosting of ProCall Web - Deployment on the customer’s own systems