Checking the recording/playback of audio devices
| State of knowledge | November 2025 |
|---|---|
| Product relevance | estos ProCall Desktop for Windows estos ProCall 8 Enterprise Server |
Observation
There is interference in the audio transmission. The speech sounds choppy.
Procedure
Check behaviour in the browser
Start the browser in the incognito mode/private window (Ctrl+Shift+N) or in the private window (Ctrl+Shift+P).
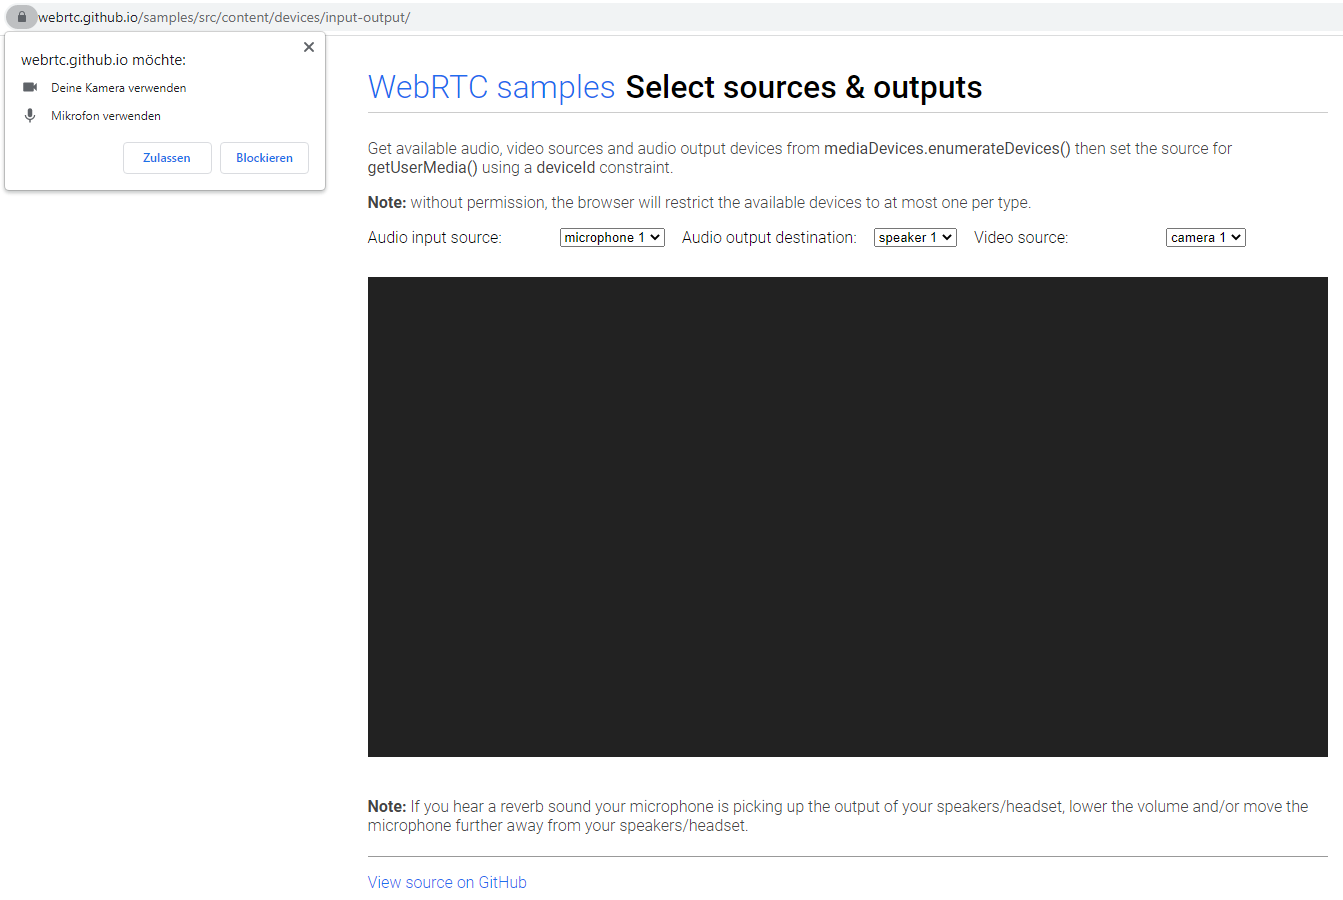
Check the behaviour of your audio devices with the following website in a WebRTC-capable browser at https://webrtc.github.io/samples/src/content/devices/input-output/
Example screenshot: Check audio devices: WebRTC samples - Select sources & outputs
Install additional Windows software to analyse the behaviour in the Windows environment between audio devices and application
By installing additional software, the audio streams (recording/playback) are recorded for checking before they are processed by ProCall Desktop for Windows.
Preparation (installation)
To determine the source of the choppy audio transmission, VoiceMeeter Banana (https://vb-audio.com/Voicemeeter/banana.htm) is installed on the Microsoft Windows server.
VoiceMeeter Banana is available under a "Donationware Model". Please note the corresponding terms of use of the provider.
After installing VoiceMeeter Banana, the operating system must be rebooted.
It should be noted that the audio devices can also be used by users:
Configuration for Remote Desktop Services (RDS)
To do this, it is important to start the Remote Desktop connection so that playback takes place on the "remote computer" and the headset is integrated as a RemoteFX (Plantronics BT600 in the example):
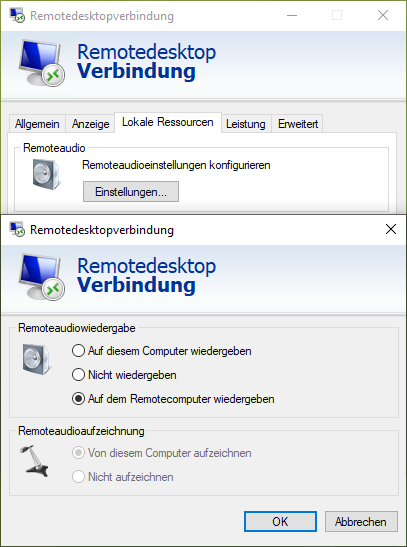
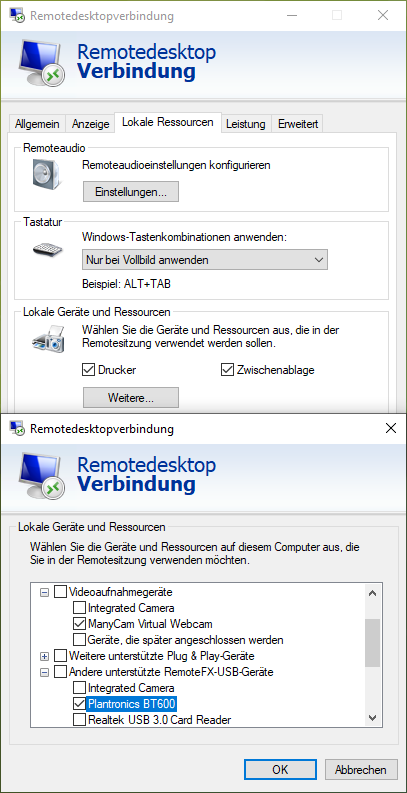
Play on the remote computer
If you do not select "Play on remote computer", the required VoiceMeeter VAIO/AUX audio devices will not be available for selection.
When RemoteFX is activated, the device is no longer available on the local workstation PC and is used exclusively for the remote desktop connection.
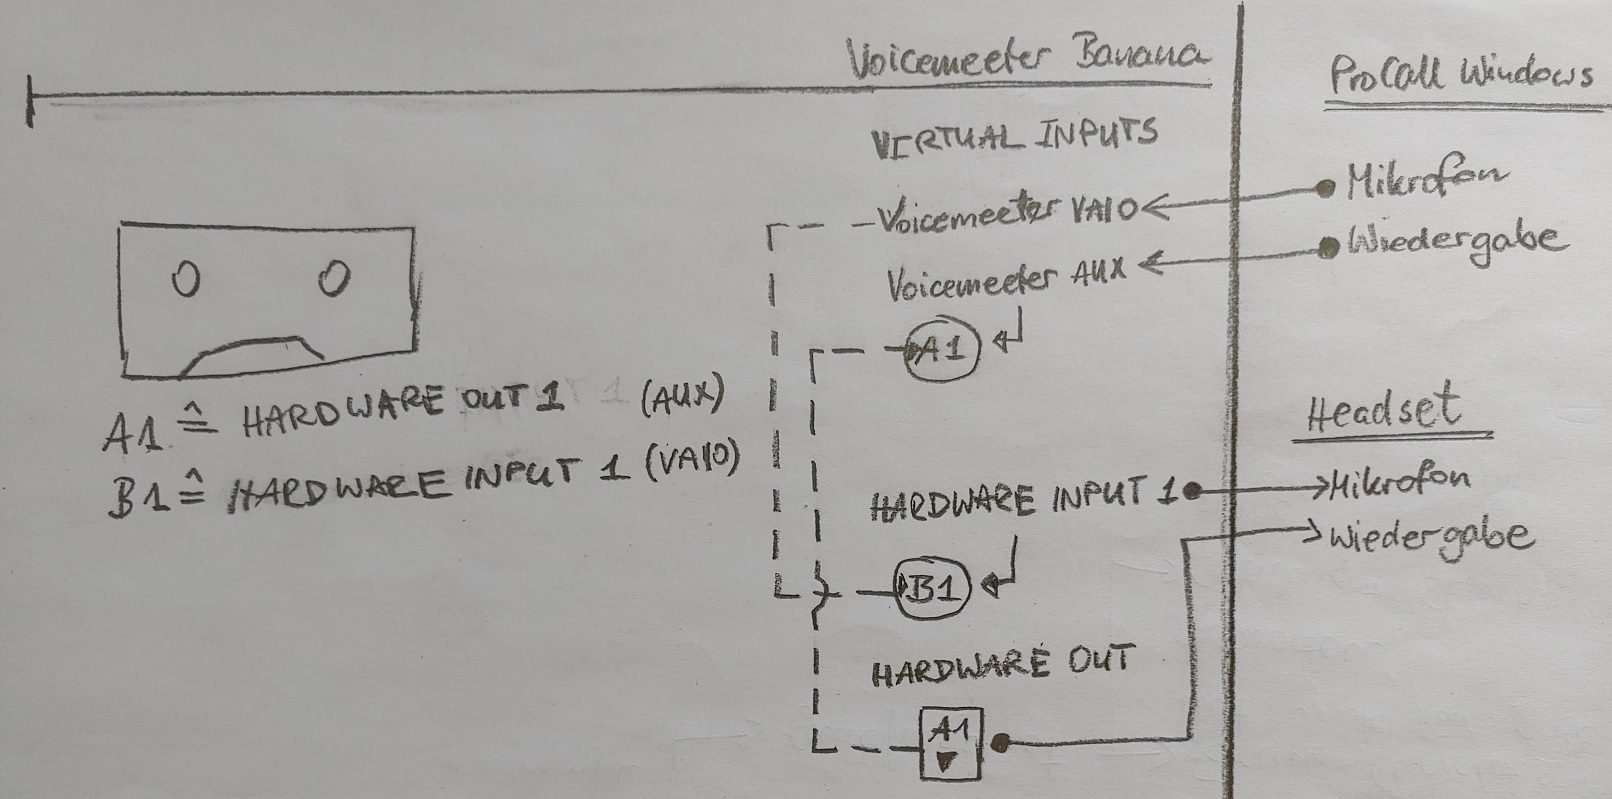
Setting VoiceMeeter Banana and ProCall Desktop for Windows
Schematic representation of the wiring
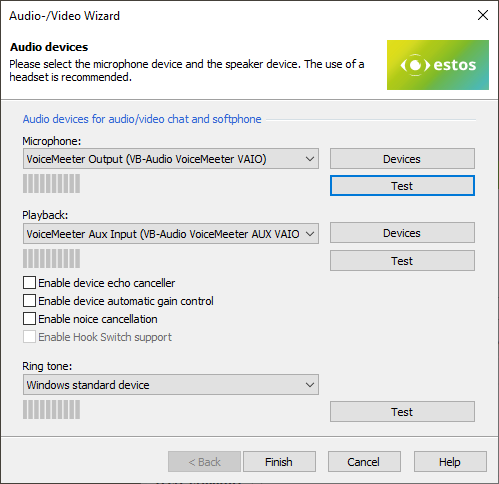
Example screenshot: ProCall Desktop for Windows audio/video wizard settings with VoiceMeeter devices
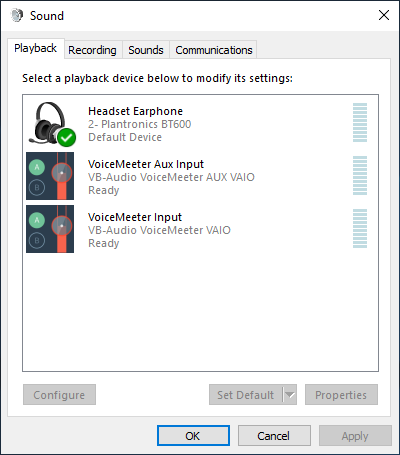
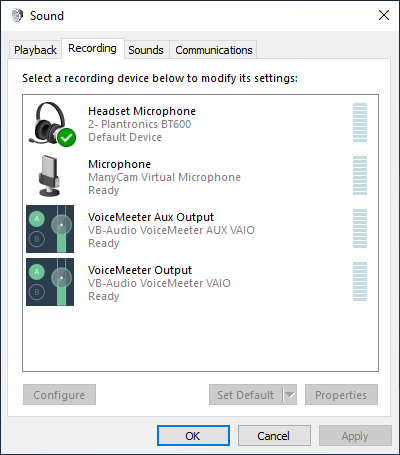
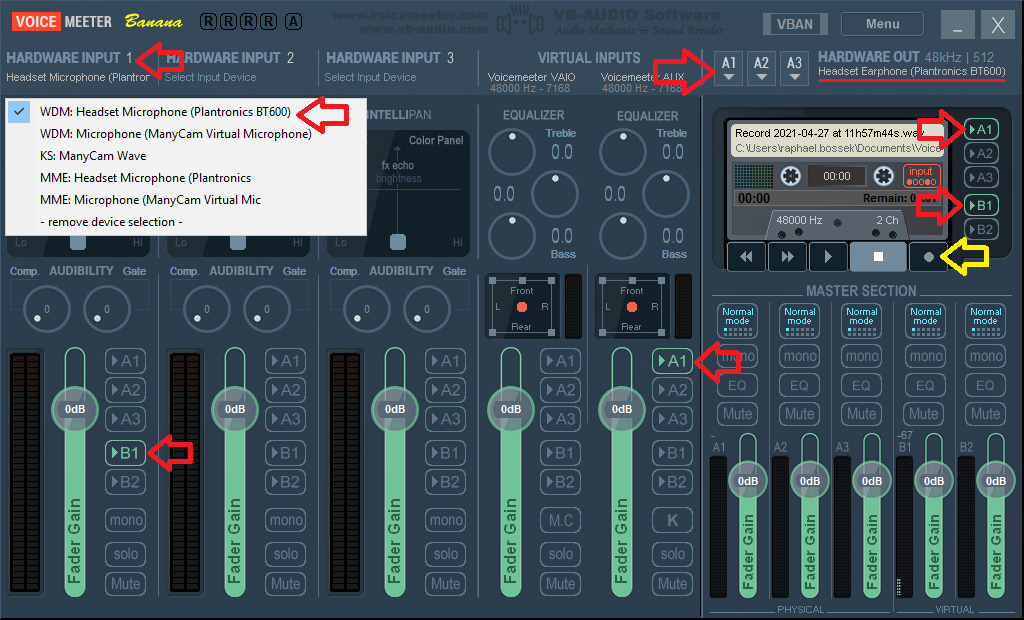
Settings in the VoiceMeeter for recording
The recording mixes the microphone (HARDWARE INPUT 1 => B1 => VoiceMeeter VAIO OUTPUT) and the playback (VoiceMeeter AUX INPUT => A1 => HARDWARE OUT) of the ProCall client (usually the voice of the other call participant) together. The recording can be changed by selecting A1 and B1, i.e. by deselecting B1 to the right of the cassette, only A1 would be recorded, i.e. only the microphone.
Selection of different driver technologies
The abbreviations WDM, MME, KS or ASIO can be used to select different driver technologies and thus check whether there is a change in real-time processing (recording/playback) depending on the driver technology.
The other party must agree to the recording, i.e. agree to it before recording.
The other party will only be recorded if the A1 channel is activated on the cassette (green), as shown in the following image.
Example screenshot: VoiceMeeter Banana Hardware Input 1: WDM Headset Microphone
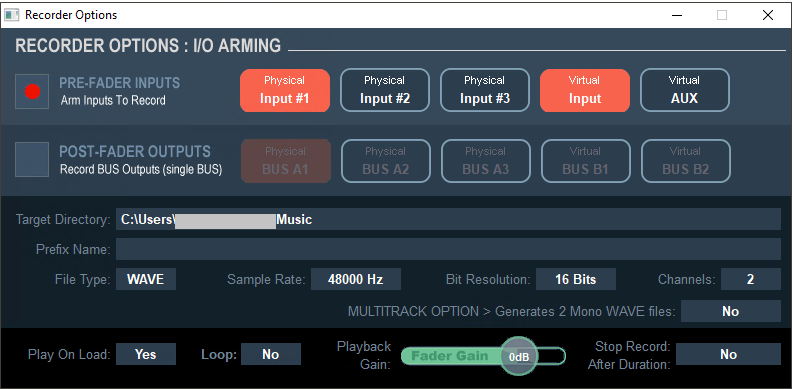
Storage location of the recording (cassette)
Each time the recording button (yellow arrow) is pressed, a new file is created.
The Target Directory can be changed via the settings (Menu / Tape Recorder Options).
The settings can also be opened with the right mouse button on the cassette:
Example screenshot: VoiceMeeter Banana Recorder Options