Set up the replicator for Microsoft Dynamics 365 Business Central
April 2026
MetaDirectory since version 6.3.3
The replicator for Microsoft Dynamics 365 Business Central is available from version 6.3.3 of MetaDirectory onwards.
This requires a few preparatory steps within the Microsoft management portals.
Procedure
Preparing Azure AD
Grant service user permissions
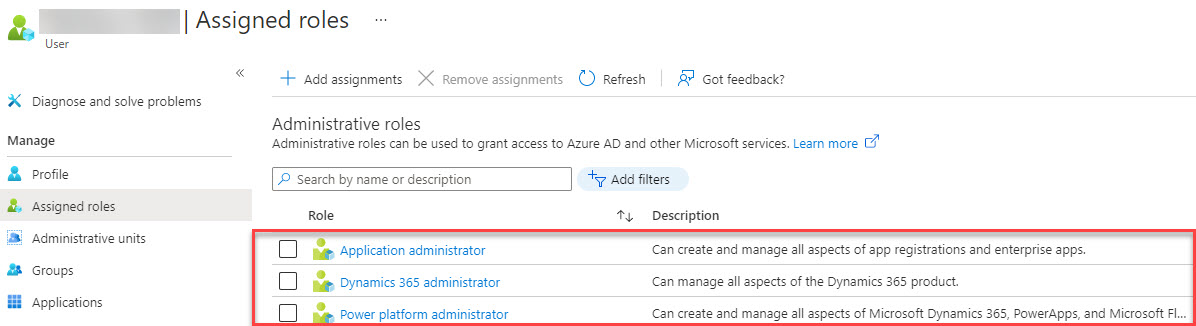
Assign the required service user via the Microsoft 365 Admin Centre (https://portal.azure.com/) under Assigned roles the required admin roles to:
Application administrator
Dynamics 365 administrator
Power platform administrator
Example screenshot: User - Assigned roles - Administrative roles
Disable multi-factor authentication (MFA) at domain level
MFA can be enabled for each individual user via https://portal.azure.com/.
Example screenshot: Azure Active Directory properties – Manage security standards

Setting up a connection to Microsoft Dynamics 365 Online – App registration
App registration
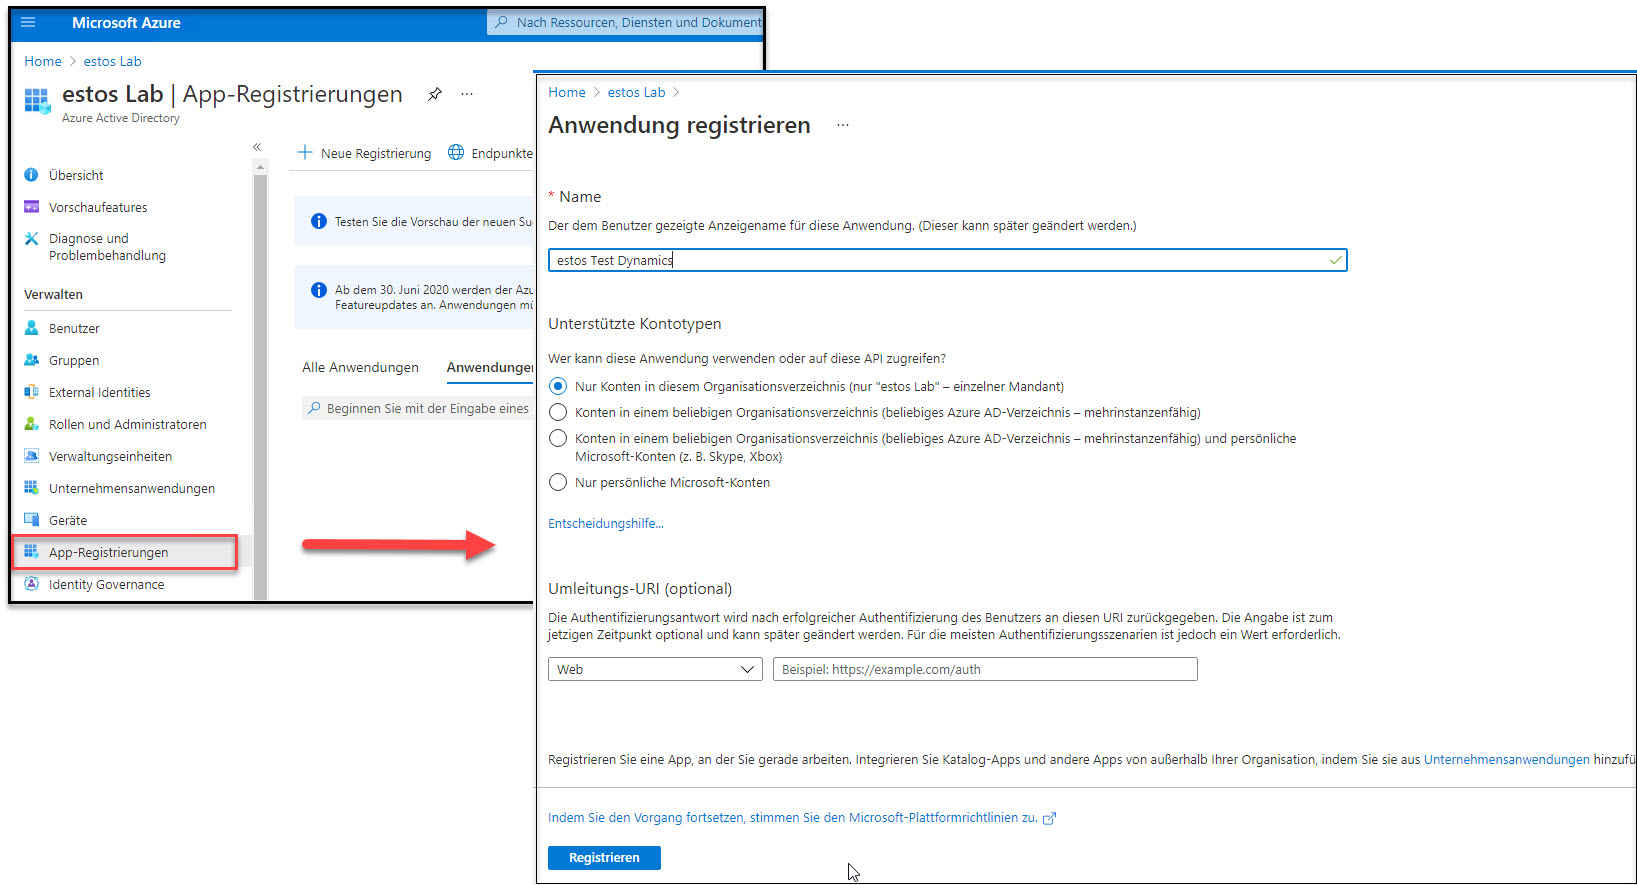
Fügen Sie in Microsoft Azure Active Directory unter App-Registrierungen eine neue Anwendung hinzu.
Example screenshot: Registering an application in Microsoft Azure Active Directory
Add API authorisation
Add new permissions to the application.
Example screenshot: Request API permissions - Dynamics CRM

Request Microsoft Graph permissions
Example screenshot: Request API permissions – Delegated permissions – Microsoft Graph
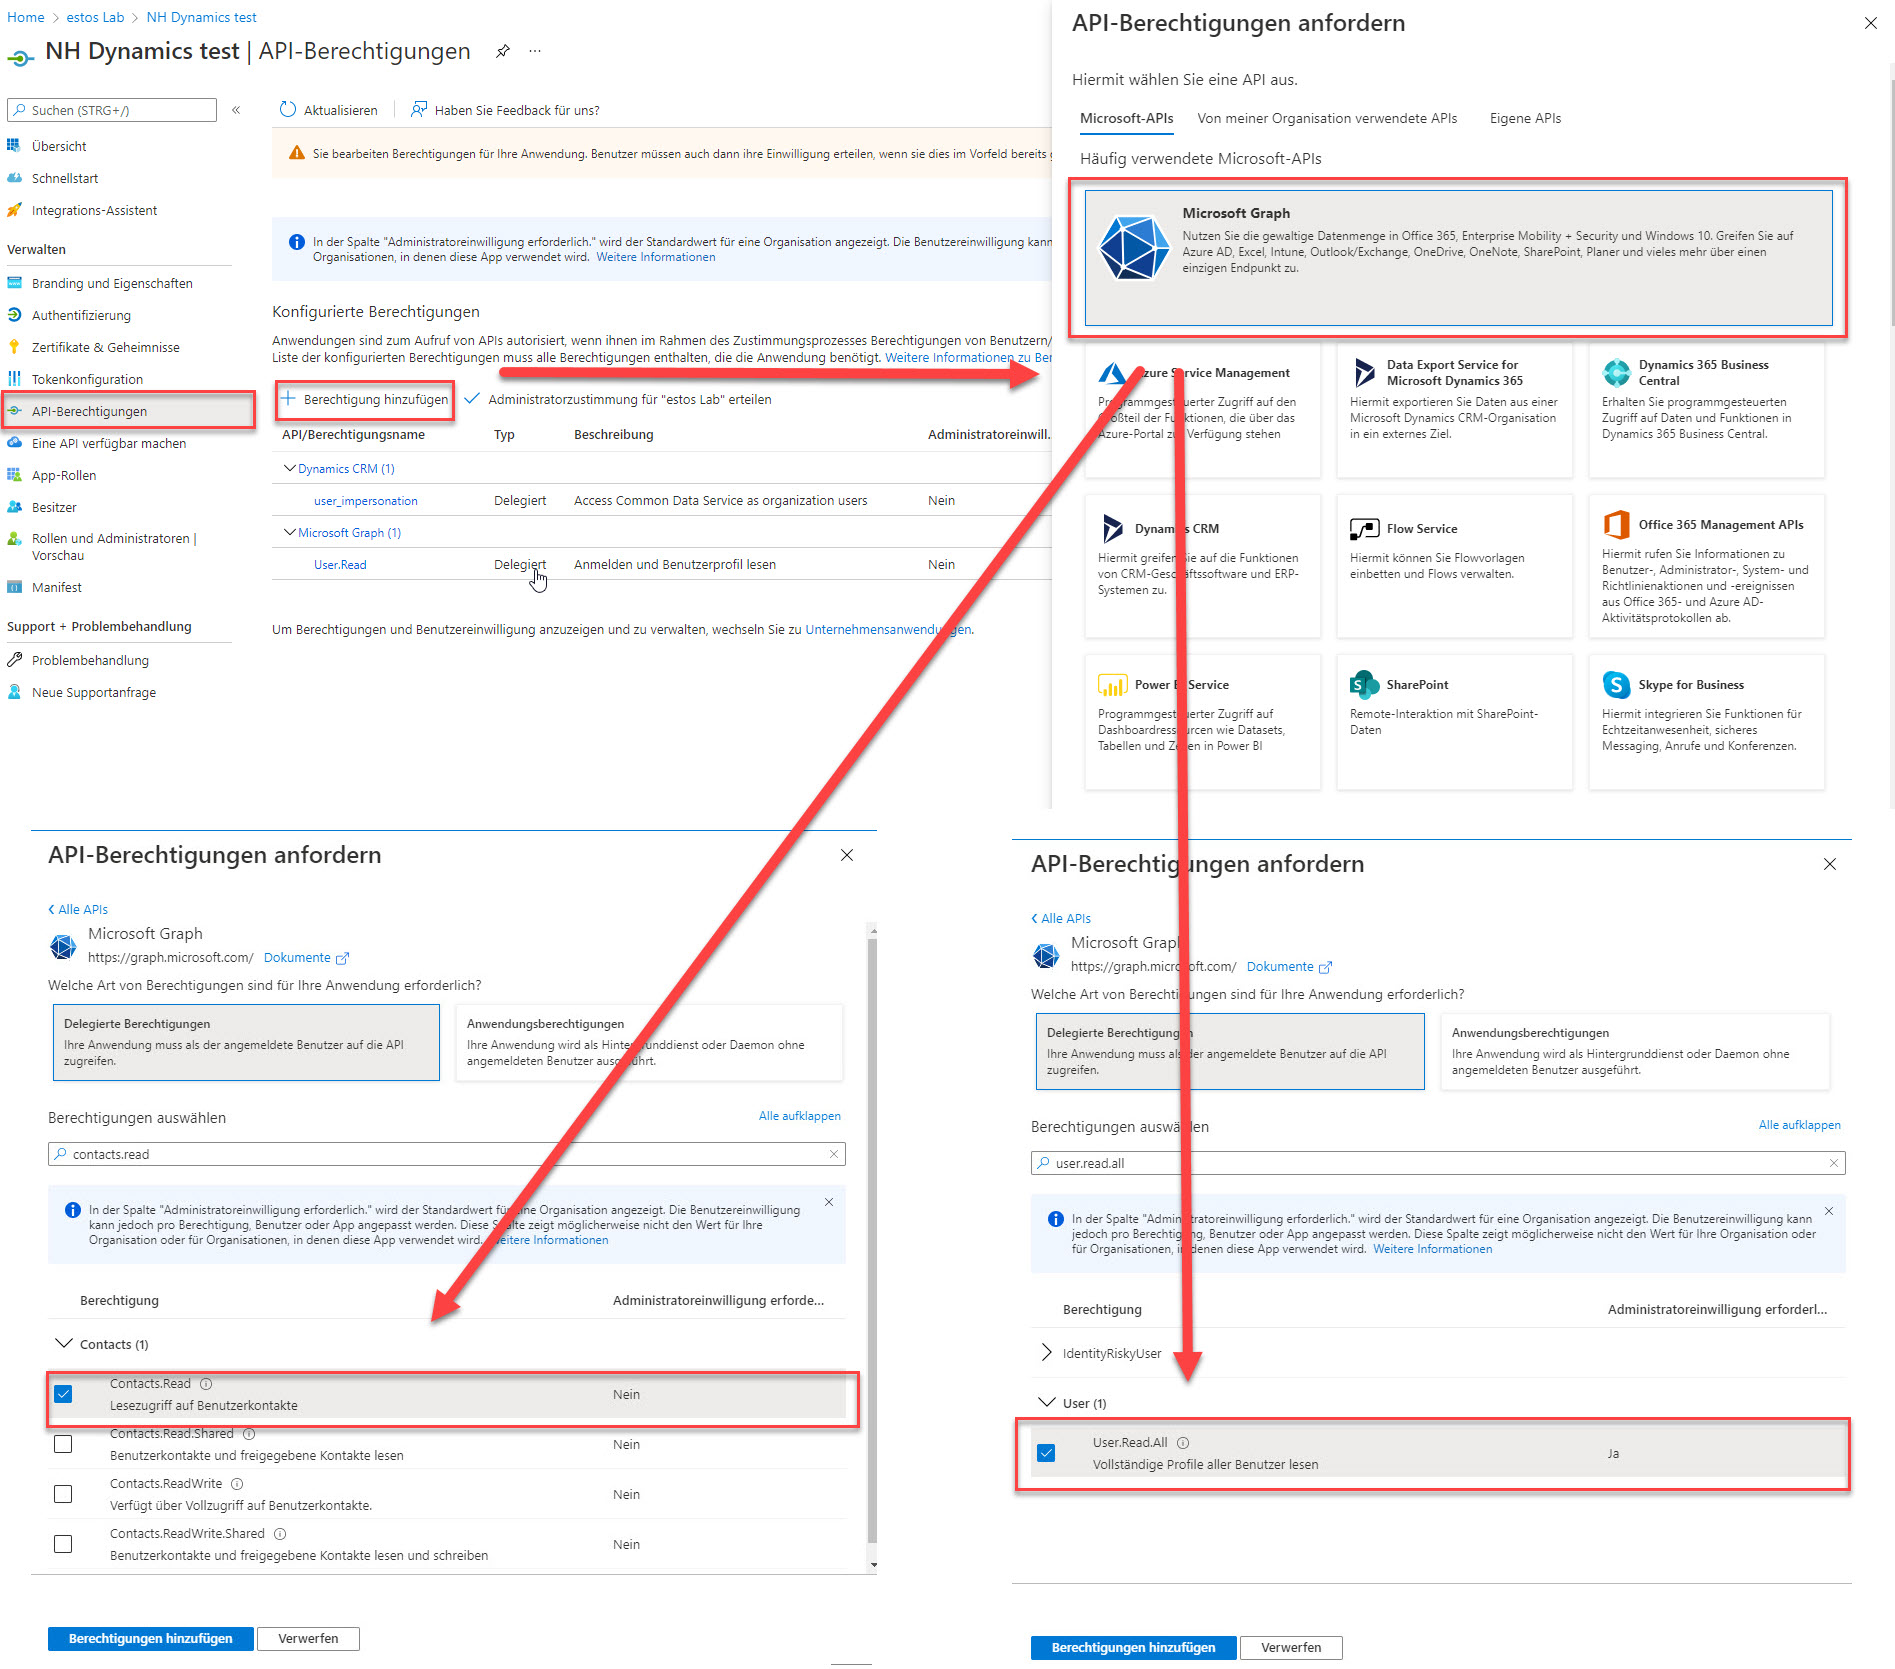
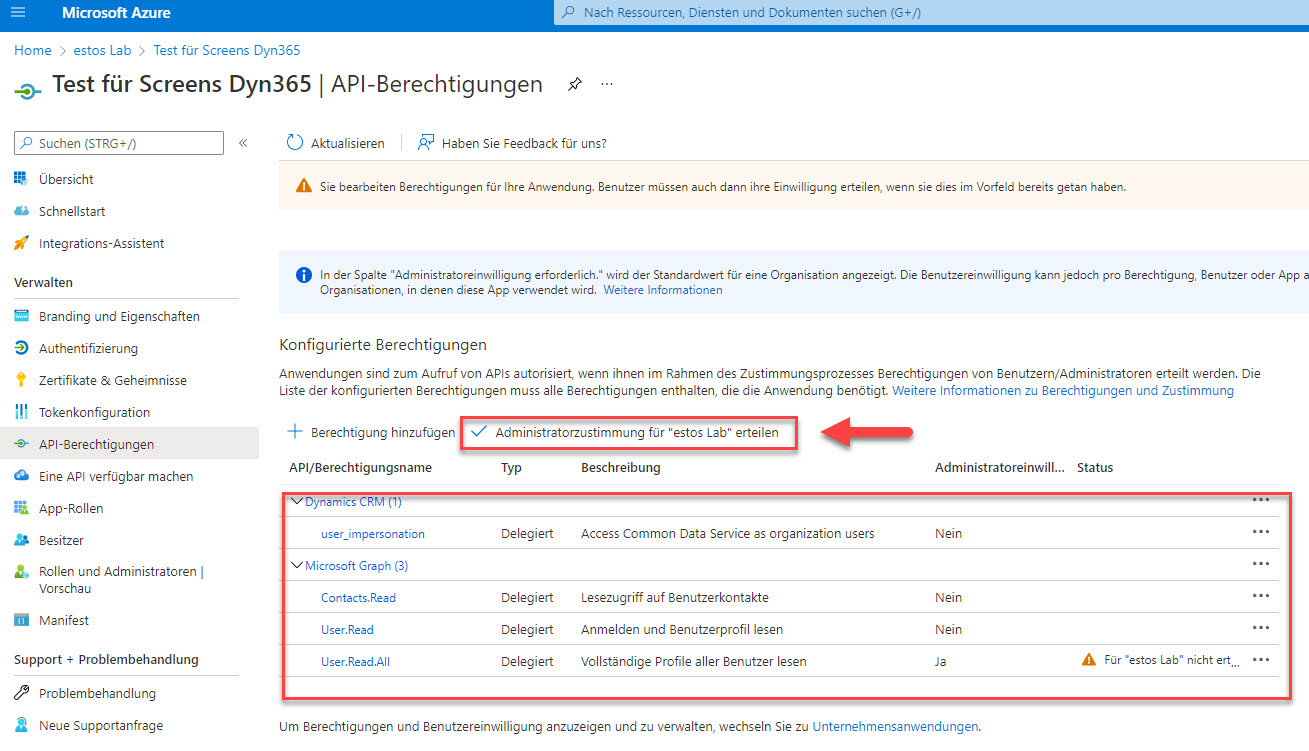
After that, the delegated permissions must still be granted via "Administrator approval".
The following permissions are therefore required:
Microsoft Dynamics CRM:
- user_impersonation
Microsoft Graph
- Contacts.Read
- User.Read.All
Example screenshot: Configured permissions
Create a new client secret
Add a new client secret under Certificates & secrets here.
Example Screenshot: Certificates & secrets - Add a client secret
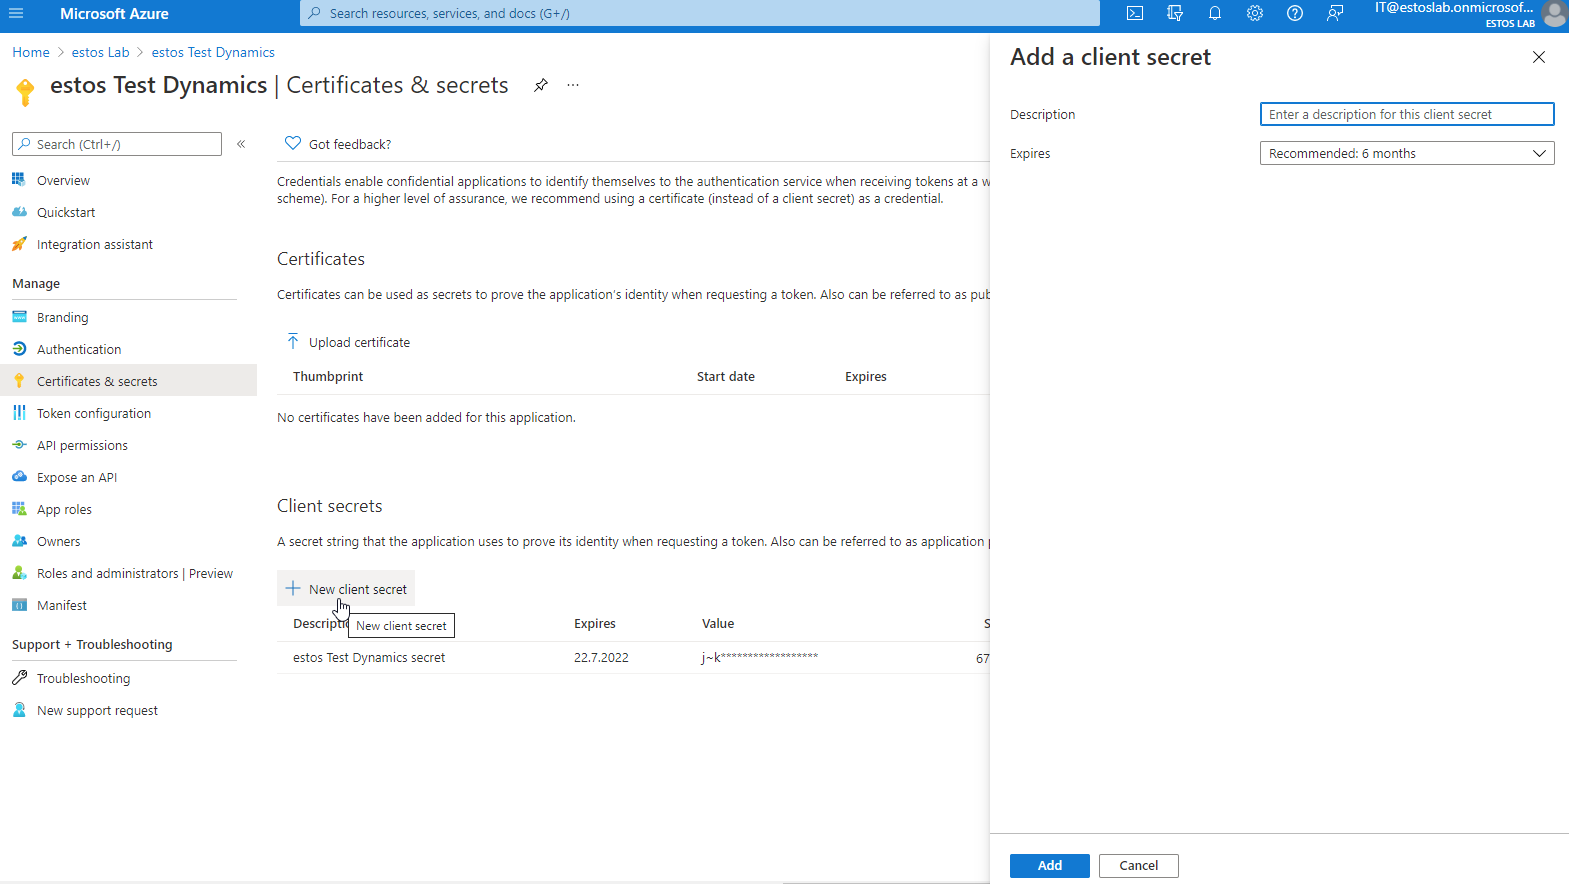
Copy value immediately
Copy the value immediately after creating it, otherwise the password will no longer be readable!
This data, including the "Value", is required when setting up the replicator in MetaDirectory.
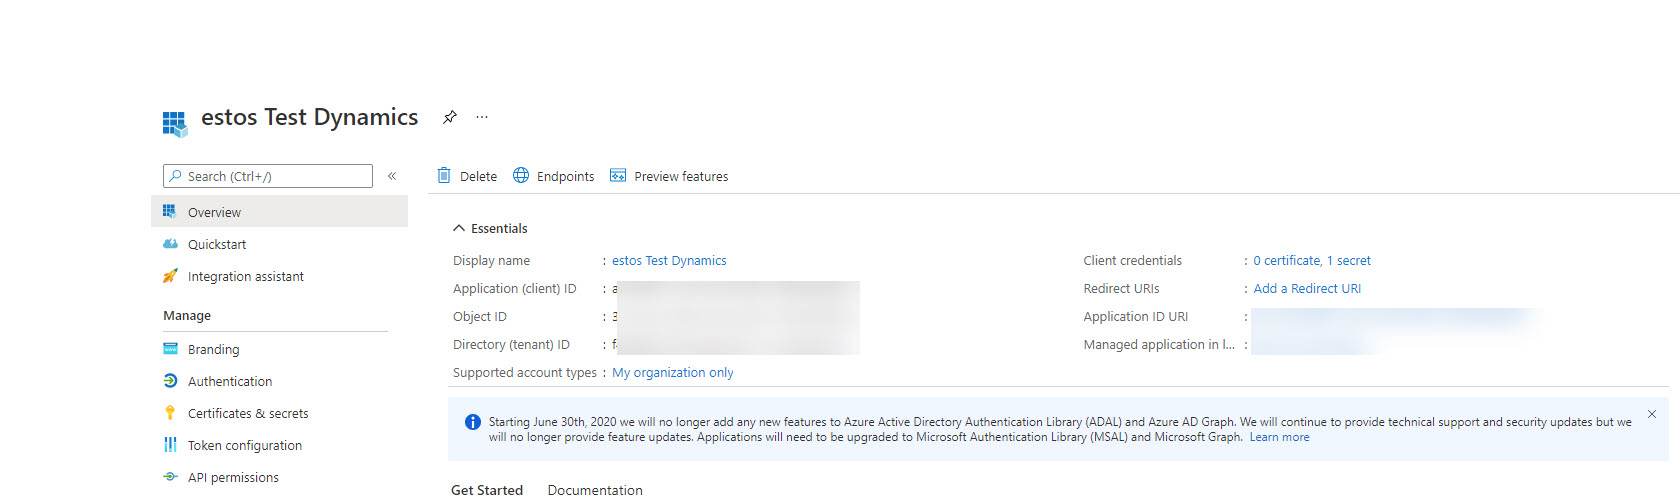
Data required in the replicator
You will need the data, including the "Value" from the previous step, in the replicator.
Example screenshot: Essentials
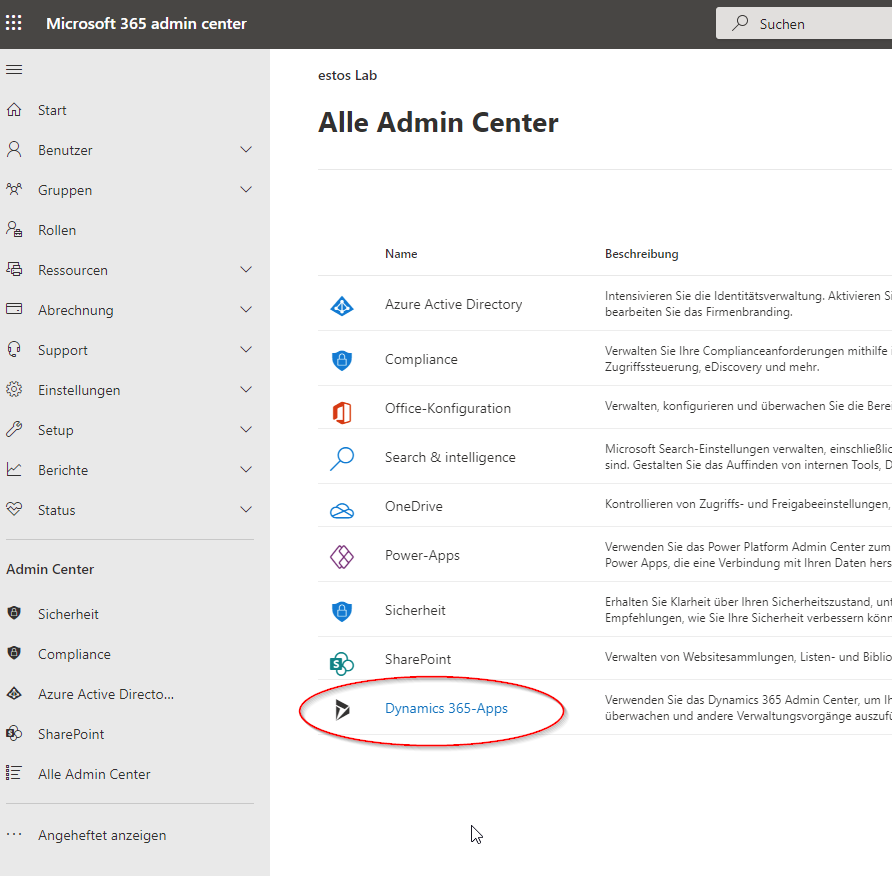
Create an app user
The Application User must be created via the PowerApps Admin Portal in the Power Platform Admin Centre.
Instructions from Microsoft
Below are the instructions from Microsoft Support:
Please find the below details to Create an application user:
Sign in to the Power Platform admin center as a System Administrator.
Select Environments, and then select an environment from the list.
Select Settings.
Select Users + permissions, and then select Application users.
Select + New app user to open the Create a new app user page
Select + add an app to choose the registered Azure AD application that was created for the selected user, and then select Add
The selected Azure AD app is displayed under App. You can select Edit to choose another Azure AD application. Under Business Unit, select a business unit from the dropdown list.
After choosing a business unit, you can select for Security roles to choose security roles for the chosen business unit to add to the new application user. After adding security roles, select Save.
Select Create.
Useful links:
https://docs.microsoft.com/en-us/power-platform/admin/create-users#create-an-application-user
https://docs.microsoft.com/en-us/power-platform/admin/manage-application-users#create-an-application-user
https://community.dynamics.com/crm/f/microsoft-dynamics-crm-forum/350363/creating-an-application-user
Beispiel Screenshot Microsoft 365 Admin Center - Dynamics 365 Apps
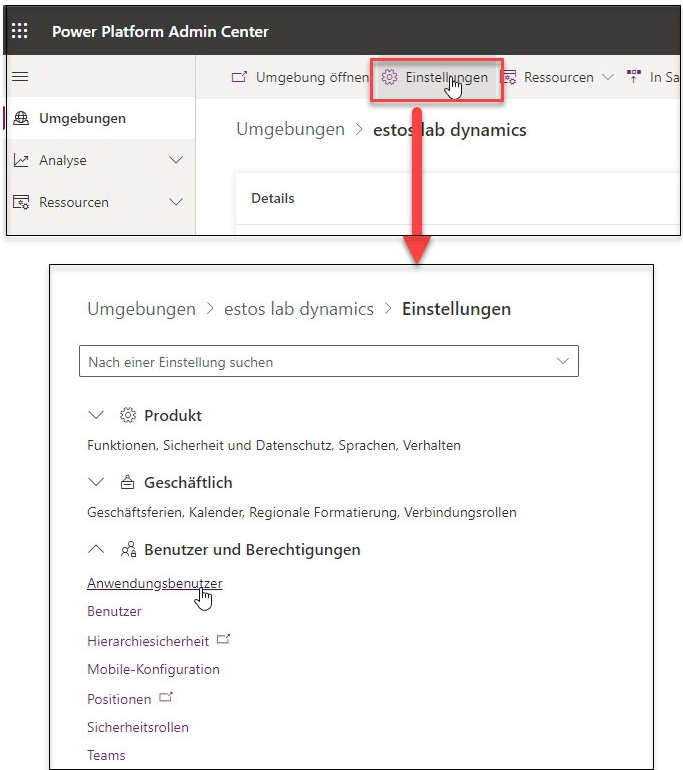
Select environment and application user
Select via Settings - Users and Permissions - Application Users from and add a new application user.
Example screenshot: Power Platform Admin Centre - Environments - Settings - Application users
Example screenshot: Environments – Settings – New app user

App: Define security roles
Select the business unit and assign a security role.
Example screenshot: App – Business unit and security roles

Grant permissions to the user in Microsoft Dynamics
To grant permissions to the user, please refer to the relevant Microsoft documentation:
Link to Microsoft Documentation
https://docs.microsoft.com/de-de/dynamics365/sales-professional/help-hub
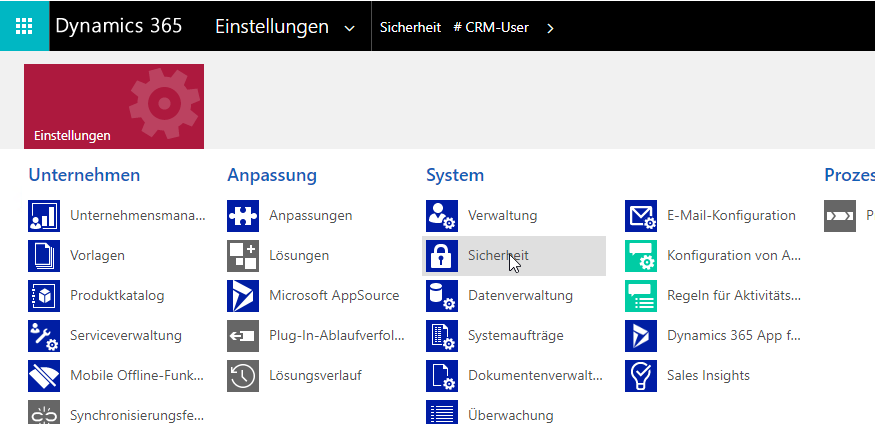
Sign in to the Microsoft Dynamics 365 web interface - Advanced settings
Sign in using an administrative account to the Microsoft Dynamics 365 web interface and navigate to the section Settings - Advanced Settings. Here, selectthe Security button.
Example screenshot: Microsoft Dynamics 365 – Settings – Advanced settings

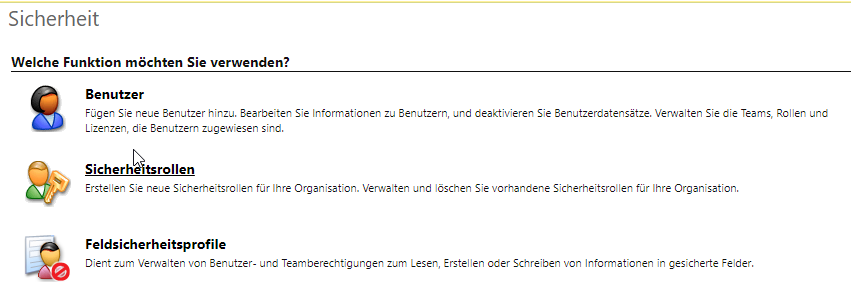
Example screenshot: Dynamics 365 - Settings - Security
Select a user and assign a role.
Select the relevant user from the Users section and assign the user the required roles to.
Example screenshot: Security – Select user
Example screenshot: Dynamics 365 – Settings – Security – Manage roles – User roles
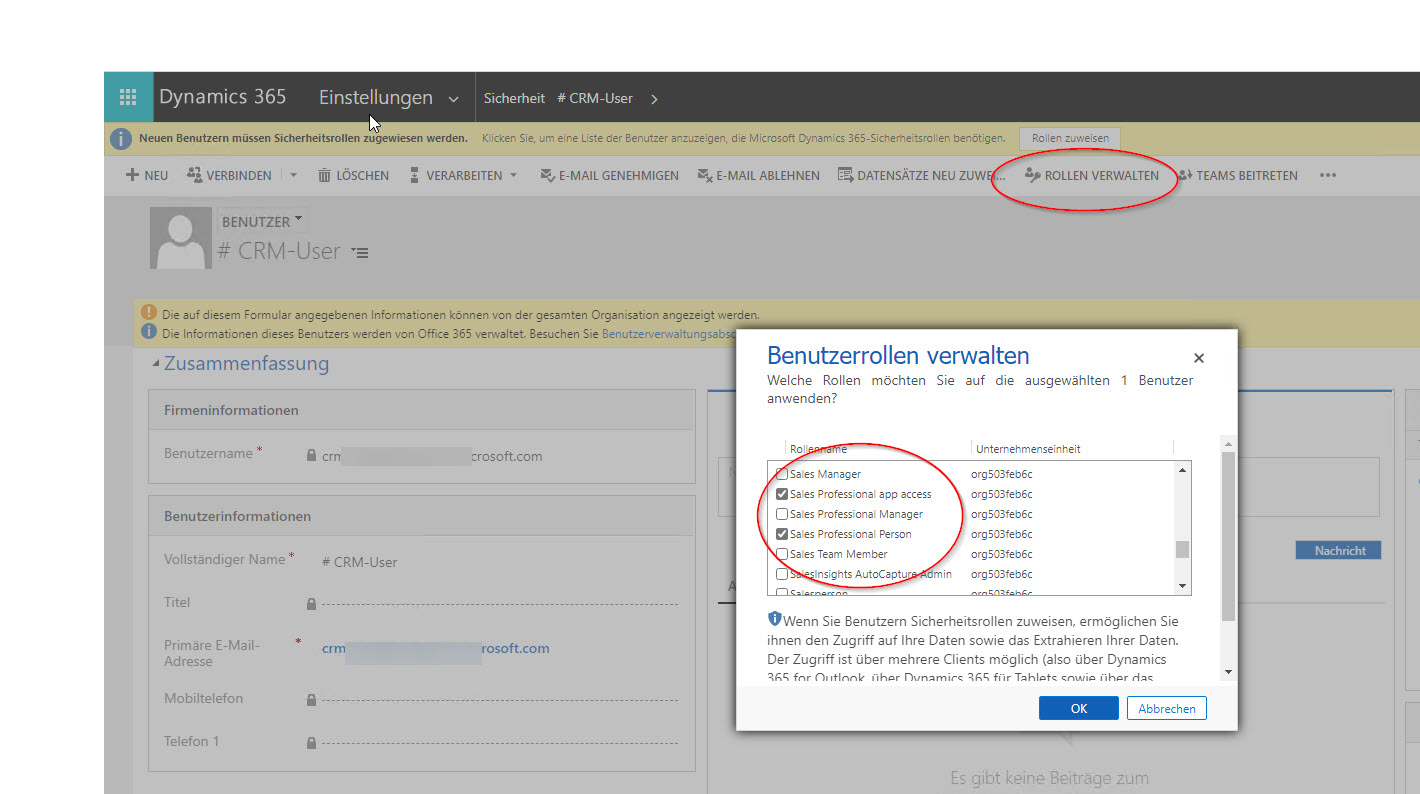
If the required roles are not available here, you probably do not have the correct licence. It is not possible, for example, to set up the system with Dynamics Test licences. A Dynamics 365 Sales Professional licence will work.
Configure the replicator in MetaDirectory
Link to estos documentation
Grundsätzliche Informationen zu den Replikatoren finden Sie in der estos Dokumentation zu MetaDirectory Enterprise.
https://help.estos.com/help/de-DE/meta/6/metadirectory/dokumentation/examples/index.htm
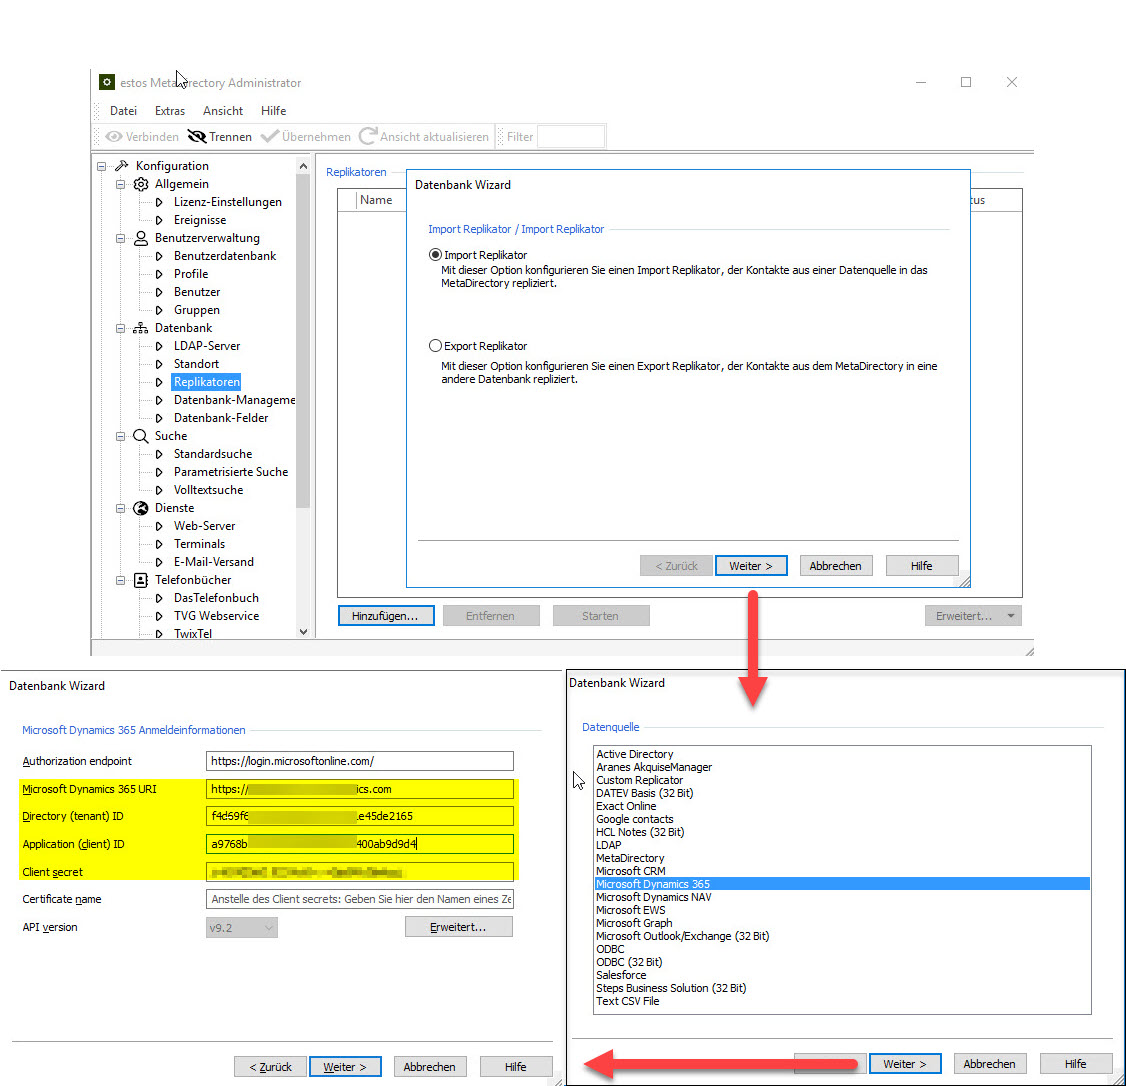
Open the administration interface via MetaDirectory Administrator and select the section Database - Replicators.
Select Add – Import Replicator – Microsoft Dynamics 365 from.
Enter the relevant values in the fields and follow the configuration wizard.
Example screenshot: MetaDirectory Administrator - Import Replicator
Optional: Configuring additional contact URLs
Additional contact URLs
If you wish to configure additional contact URL links, (https://help.estos.com/help/de-DE/meta/6/metadirectory/dokumentation/configuration/database/replicators/wizard.htm), it is important to specify the URL with the corresponding <EntryID> variable and not to specify a URL with an absolute reference to a specific contact .
Example: https://[organisation].crm4.dynamics.com/main.aspx?app=d365default&forceUCI=1&pagetype=entityrecord&etn=contact&id=<EntryID>
Further information
MetaDirectory 6 Enterprise specifications
MetaDirectory 6 Enterprise system requirements