Best practice: Activating and setting up services via UCConnect
April 2024
Production mode
- Create a UCConnect account
- Create account
- Verify account
- Connect UCConnect account to the UCServer
- Activate license for productive or test mode
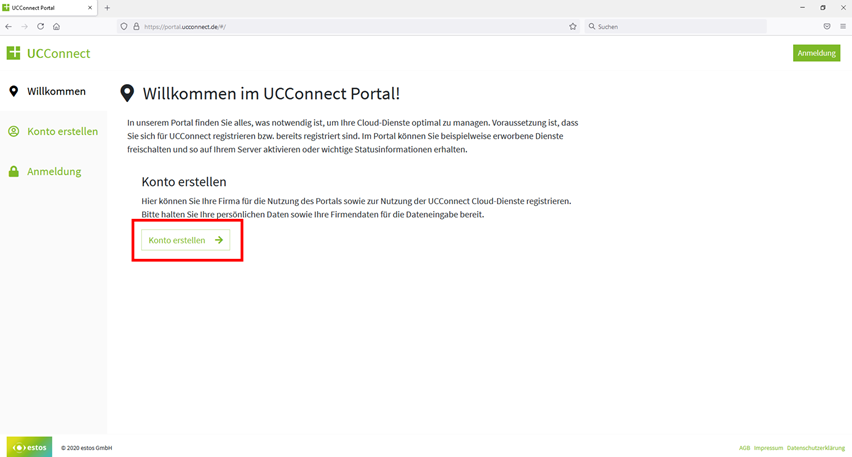
Create a UCConnect account
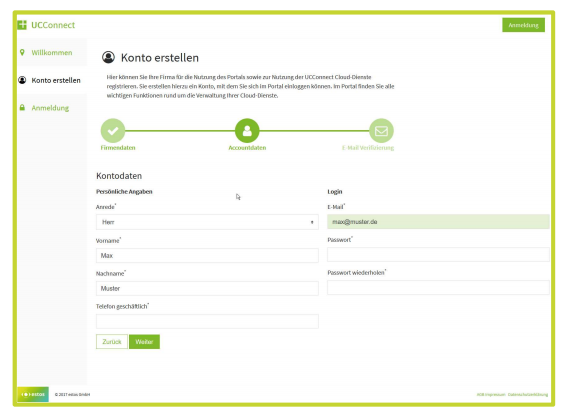
To do this, go to the following website: https://portal.ucconnect.de/ and select the Create Account function.
Example screenshot: Create UCConnect account
Activate services
Run through the wizard and select "Activate services" when finished.
You will be taken to your server account.
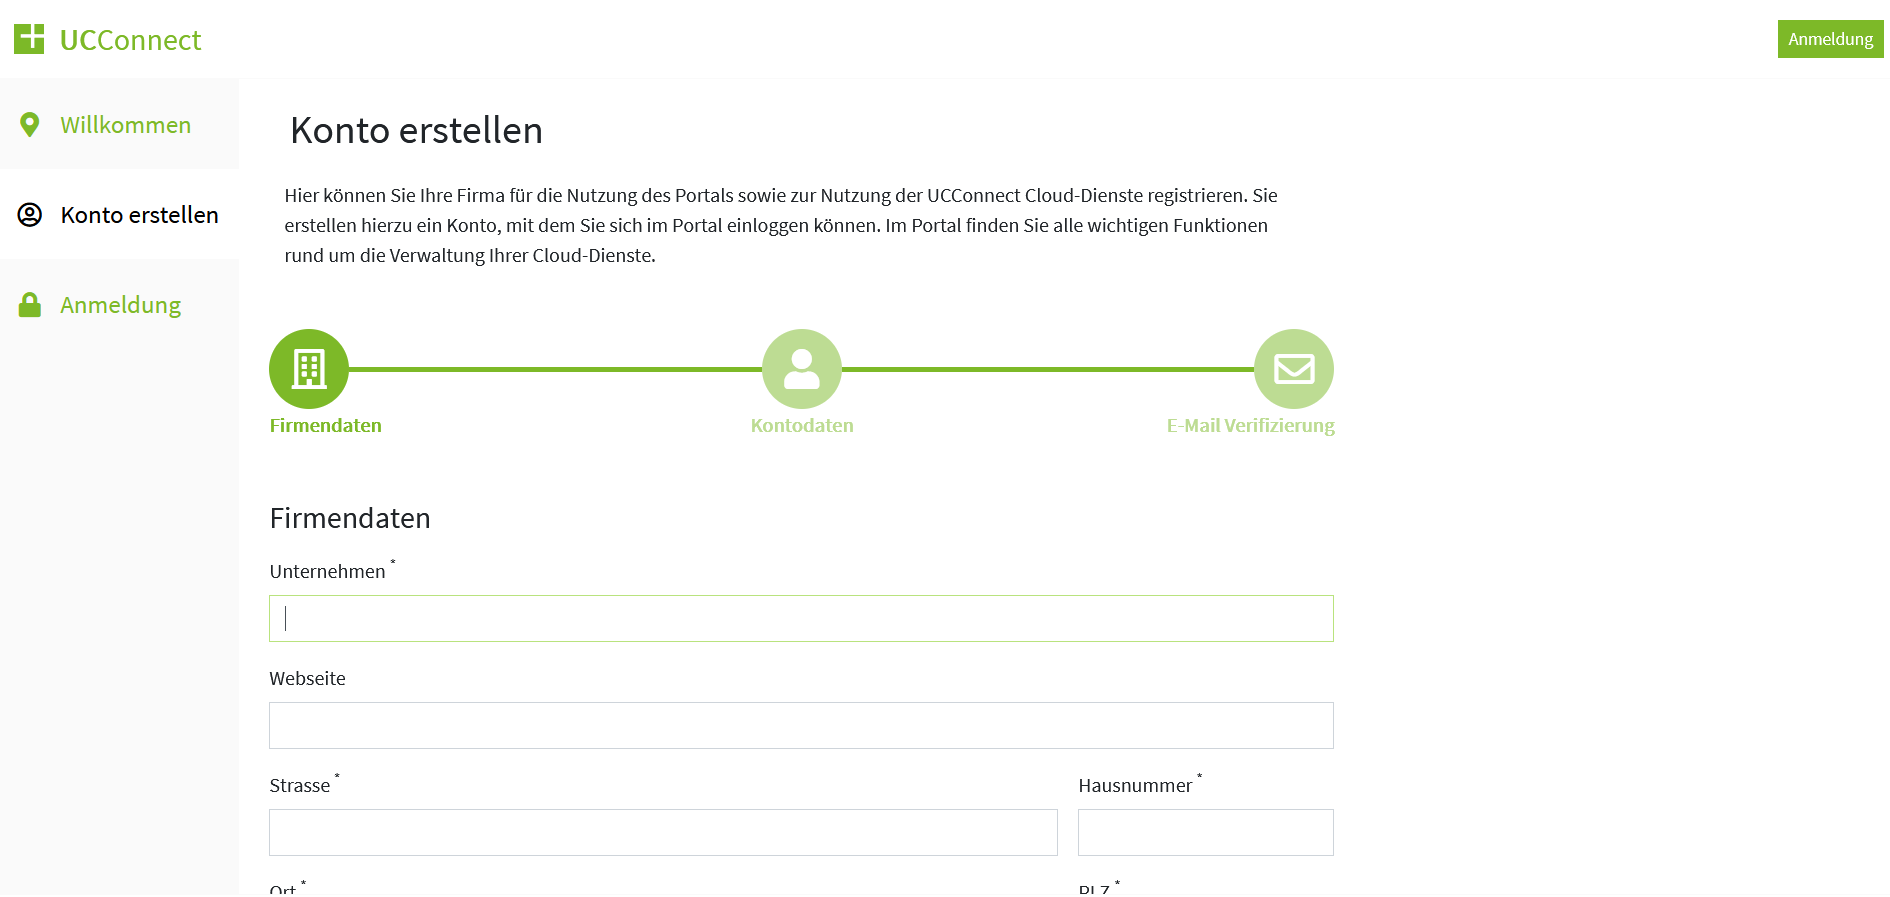
Example screenshot: Enter company data
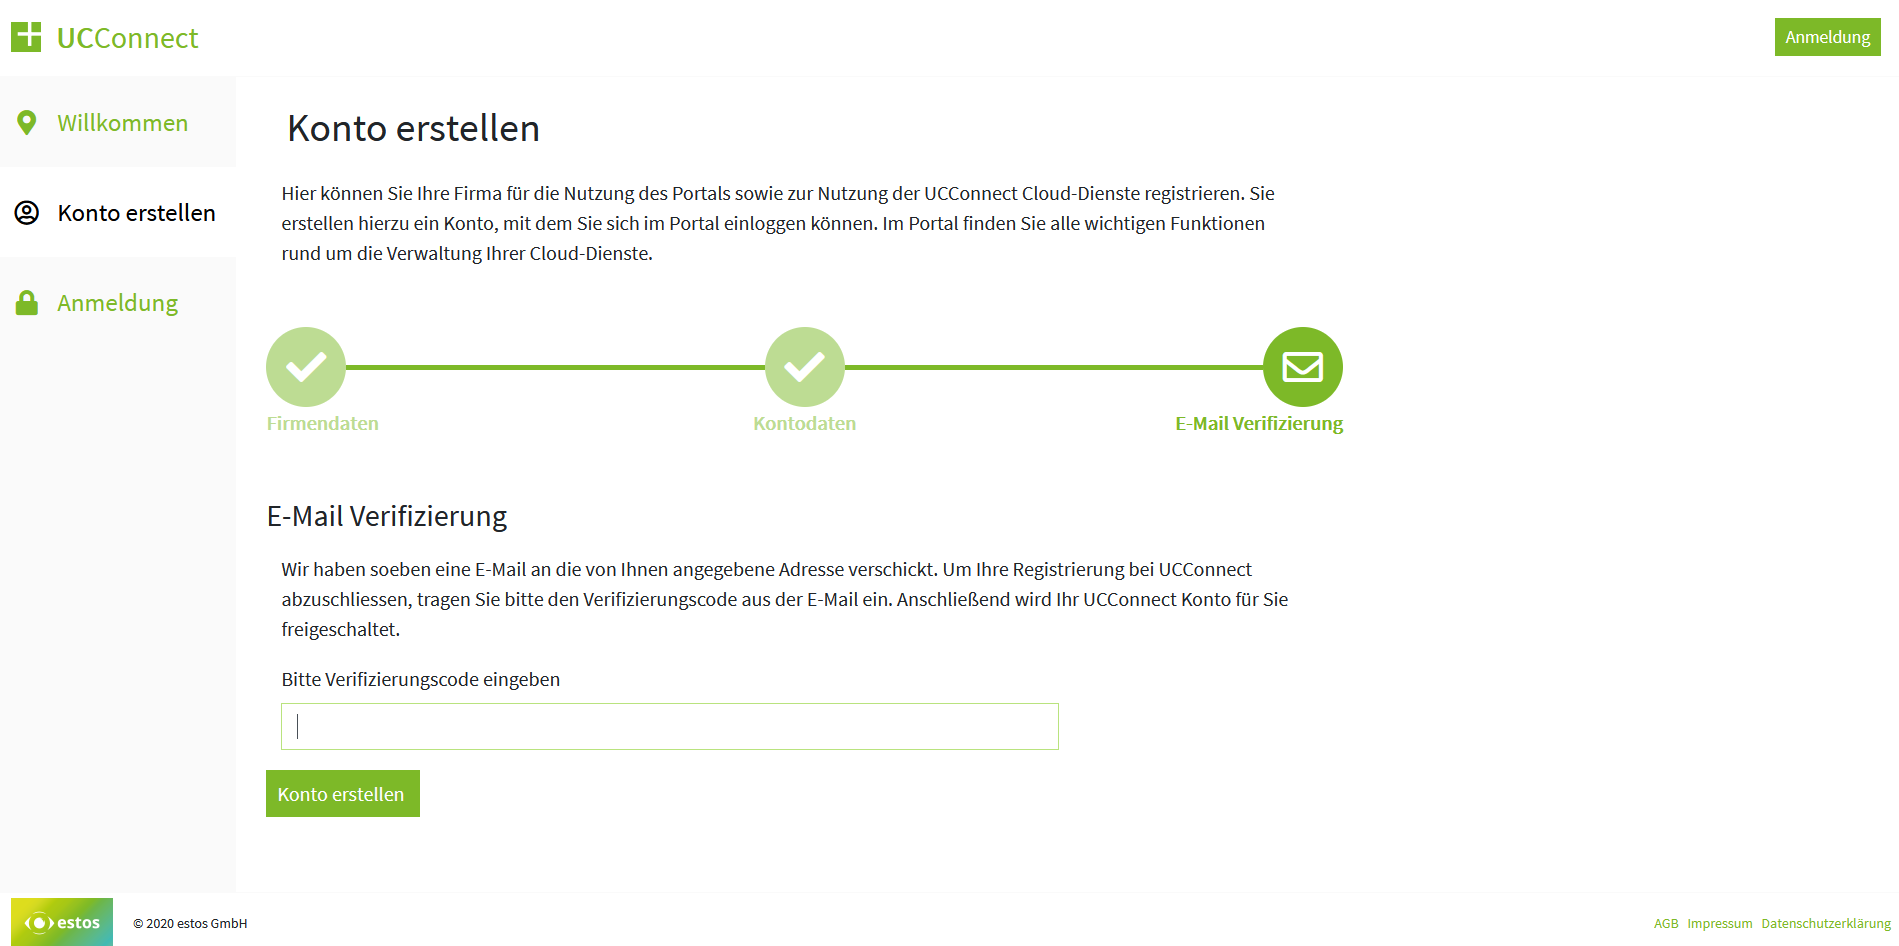
Verify UCConnect account
Verify your UCConnect account.
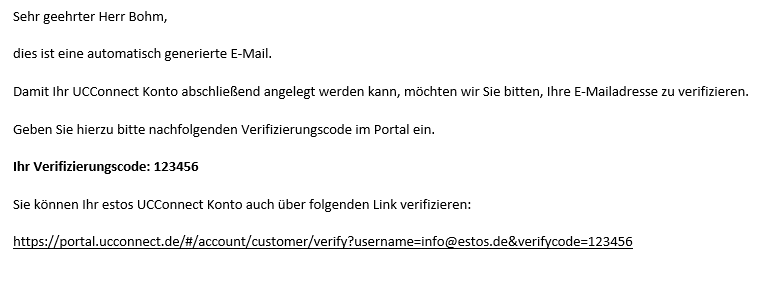
After creating a UCConnect account, you will receive an automatically generated e-mail with a verification code. This code is needed to verify your UCConnect account.
Example screenshot: UCConnect account verification
Example screenshot: E-mail confirmation with verification code
See also: Resend invitation e-mail for user accounts
Connect UCConnect account to the UCServer
Connect your UCConnect account to the UCServer.
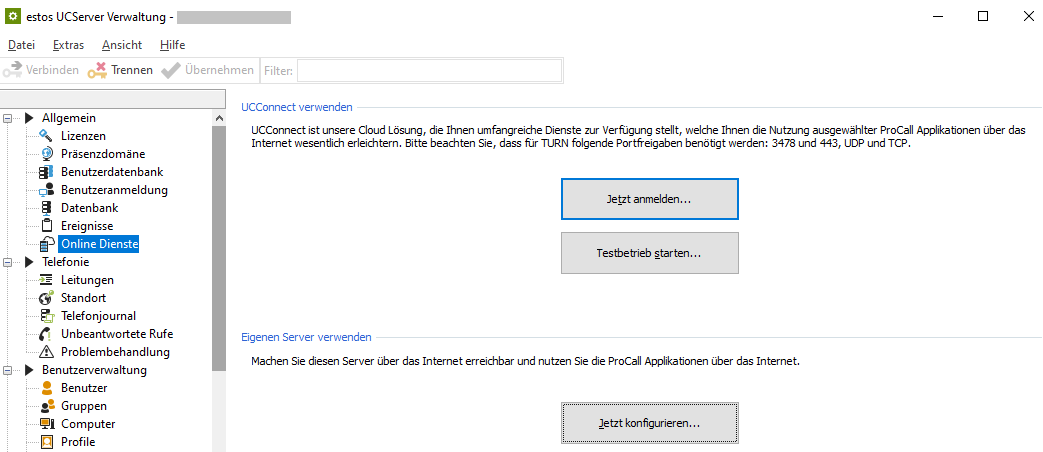
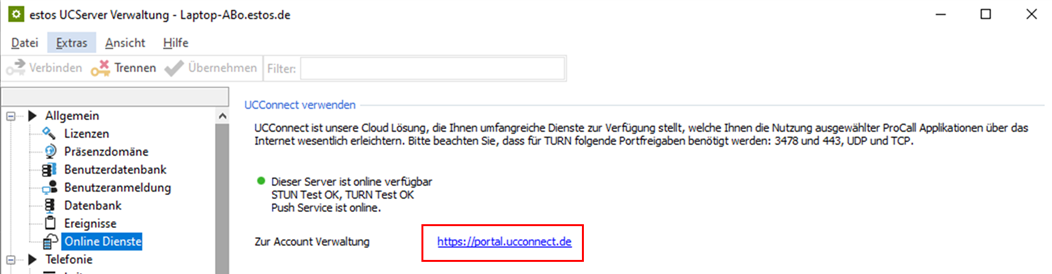
To do this, open the UCServer Administration → Online Services → Use UCConnect → Log In Now
Example screenshot: UCServer Administration – Online services – Log in now
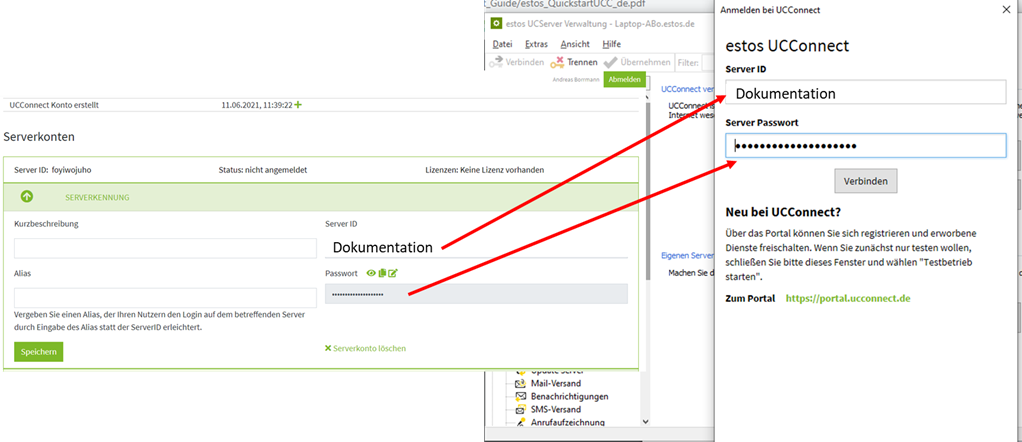
Enter UCConnect server ID and password
Enter the UCConnect server ID and password in the field in the UCServer for connecting to UCConnect.
Example screenshot: Log in to UCConnect – enter server ID and password
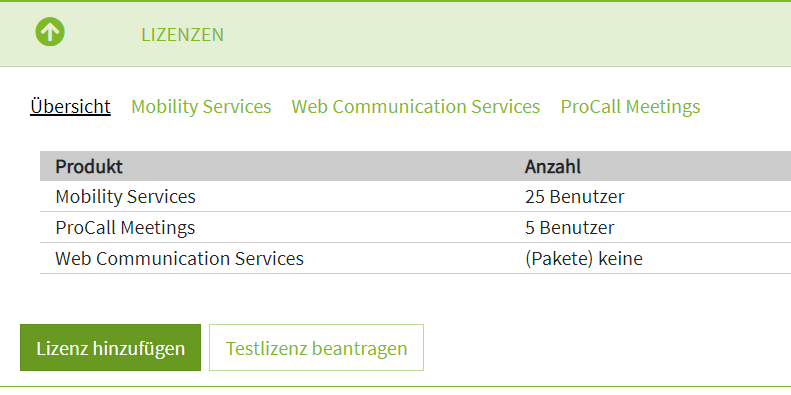
Activate licenses
Under Licenses, activate the desired full or test license.
Test mode
We would like to give all our customers the opportunity to see for themselves – without obligation and free of charge – the range of services via UCConnect. All services can be used free of charge for a limited trial period.
Start test mode via the UCServer
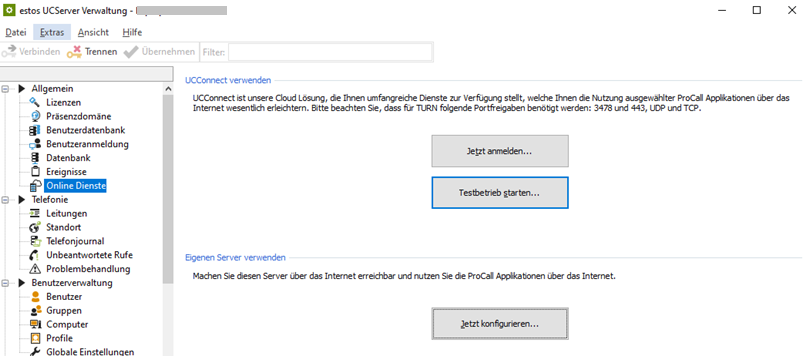
Select the button "Start test mode" in the UCServer administration under the item Online services.
Example screenshot: UCServer Administration – Online services – Start test operation
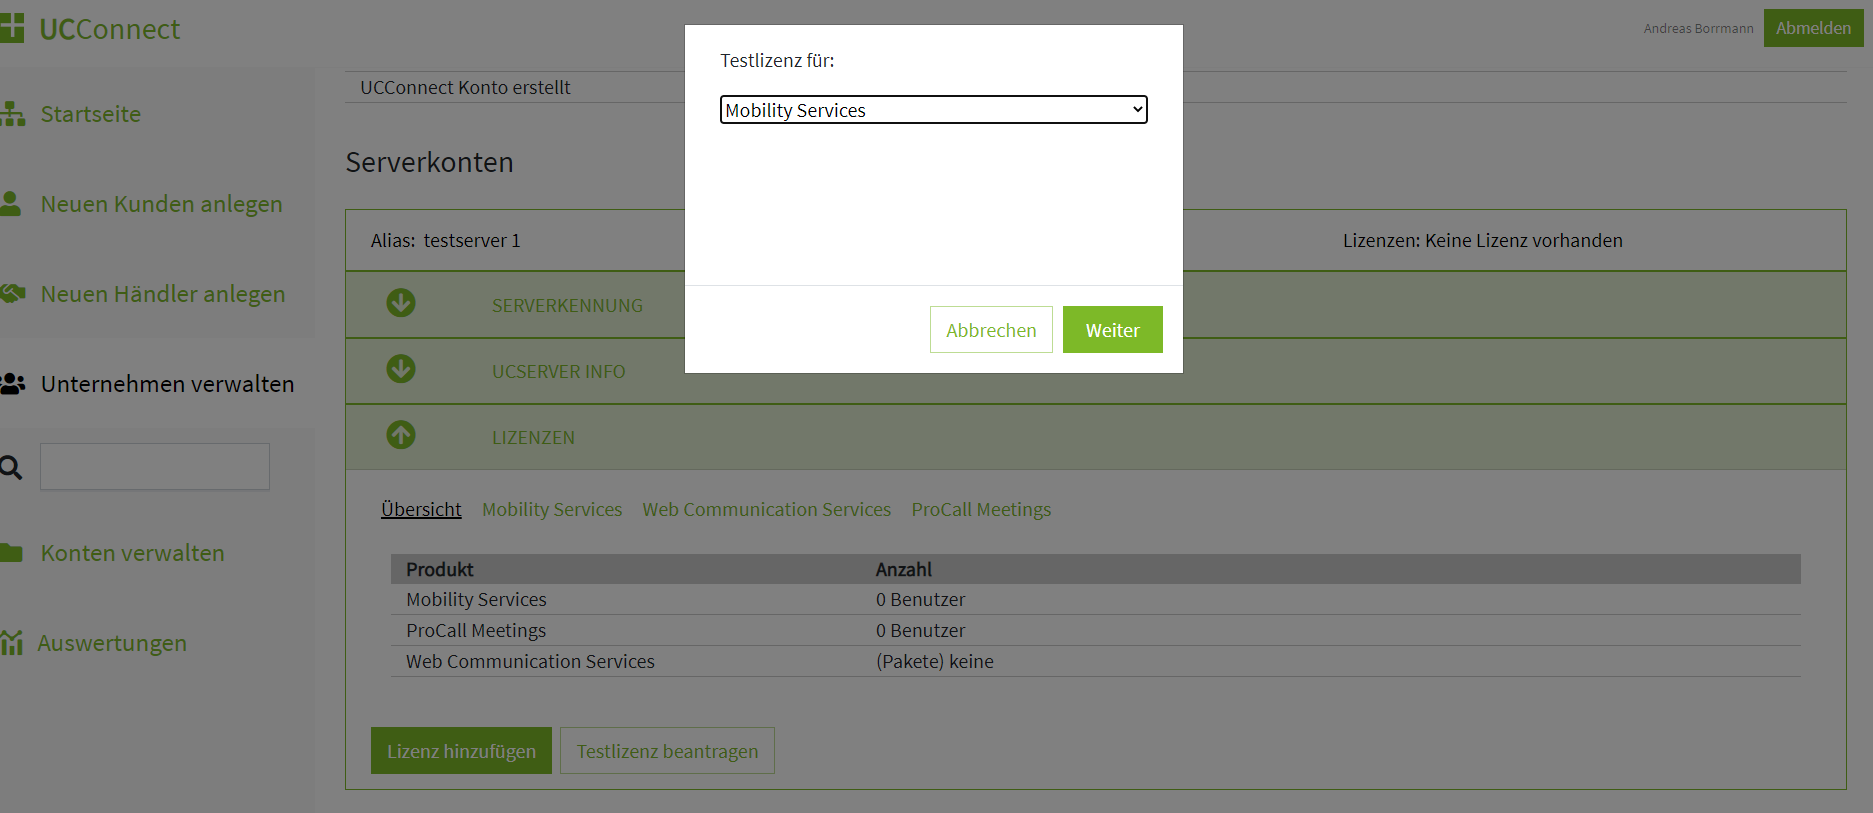
Create test account
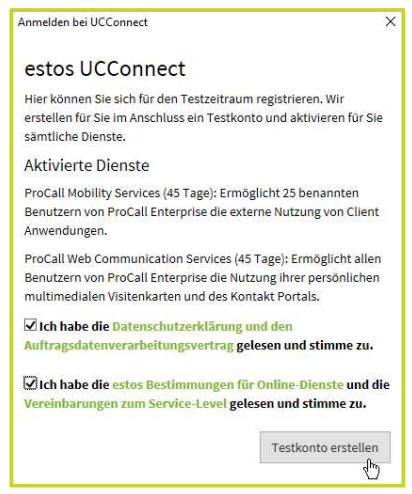
Go through the wizard, read the additional terms and confirm with "Create test account".
Example screenshot. Log in to UCConnect – Create a test account
Finished
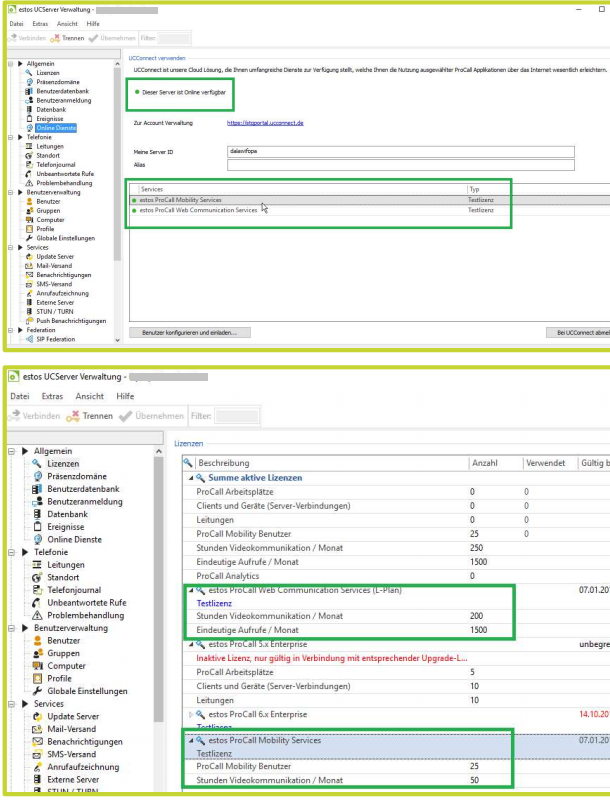
Your UCServer is now equipped with all trial licenses and you can access the service offering for 45 days.
Example screenshots UCServer Administration – Online services – Using UCConnect – Services and licenses
Transition test mode → full license
You can obtain licenses for all UCConnect services either from your usual sources or via our online store.
Unlike the test mode, you need a verified UCConnect account to activate full licenses.
Open link
Select the link that is displayed under the Online Services item in the UCServer Admin.
This leads to the UCConnect portal.
https://portal.ucconnect.de/
Example screenshot: UCServer Administration – Online services – Account
Confirm account details
Go through the wizard in our UCConnect portal. All known data from your test account is already pre-filled.
Example screenshot: UCConnect Portal – Confirm account data
Activate services
At the end of the wizard, select "Activate services" immediately. You will be taken directly to your server account.
Activate licenses
Activate the desired license for the respective service on your server account.
Example screenshot: Activate license for services
Example screenshot: Enter the activation key
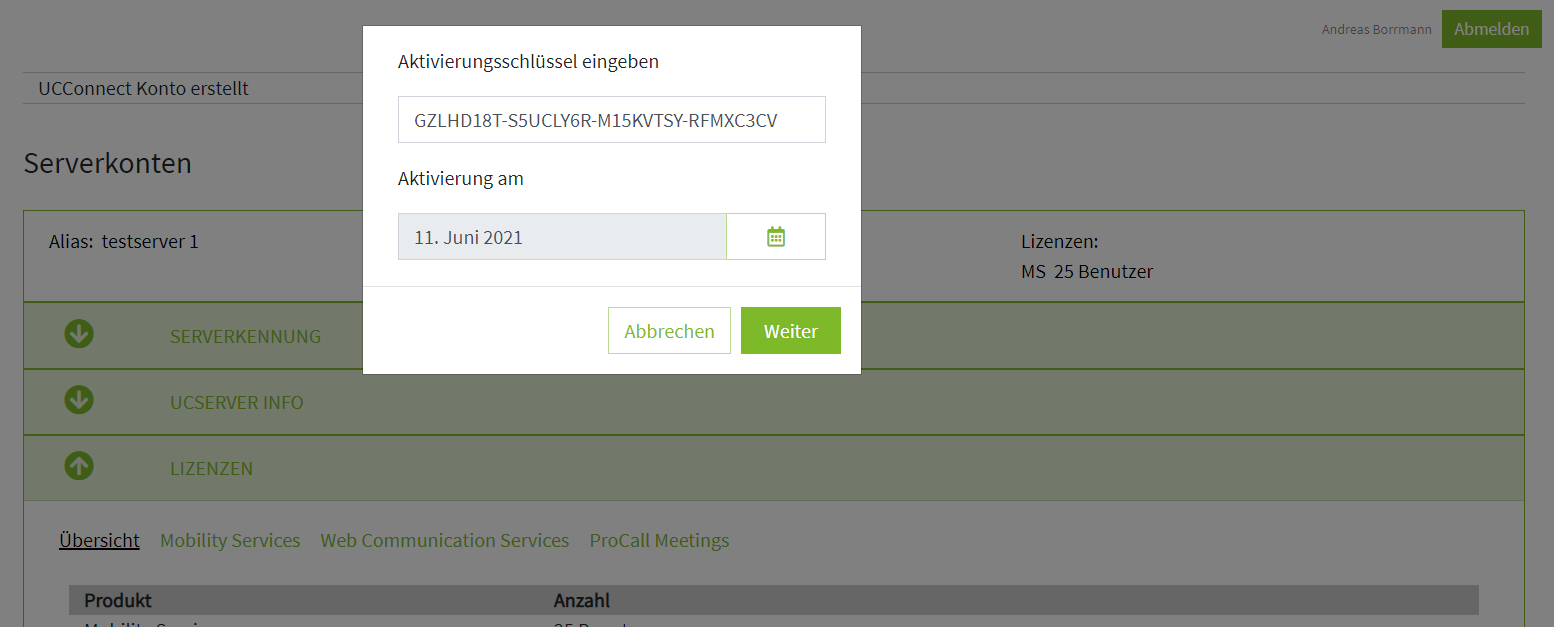
Example screenshot: Add license
Your UCServer will automatically take over the newly activated licenses in the connected state (server account is connected to the UCServer).
ProCall Mobility Services – App enablement
Whether you use the supported process through UCServer Admin or not, it's just a few steps for users to get there either way.
About the UCServer Admin
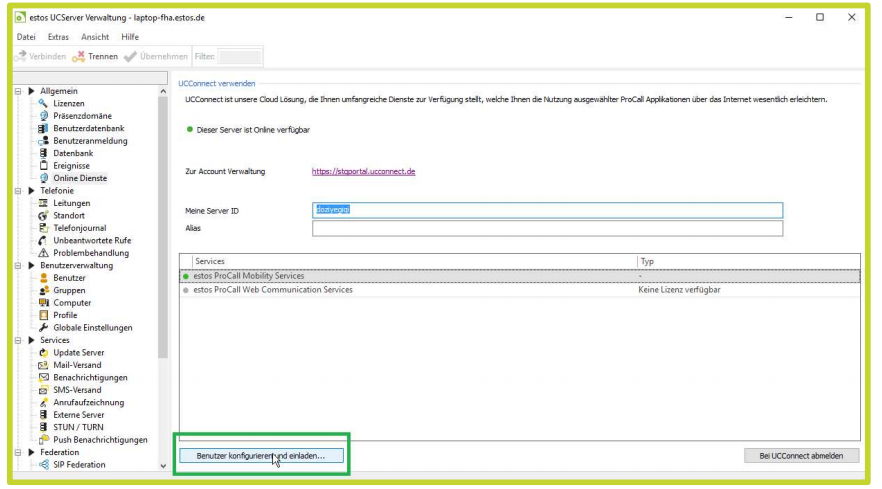
Invite users
Select "Invite user" under the Online Services menu item.
Example screenshot: UCServer Administration – Online services – Using UCConnect – Configuring and inviting users
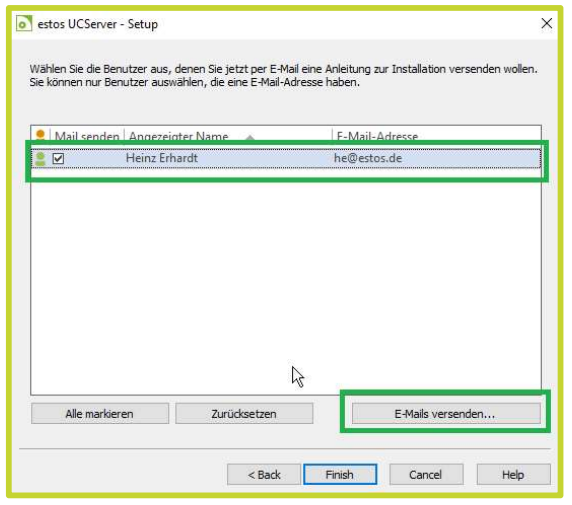
Send e-mails
Determine those users who should be invited to use the app and click "Send e-mails".
Example screenshot: UCServer Setup – Send e-mails with installation instructions to the users
User: open e-mail, download app and log in with password
Users retrieve the e-mail on their smartphones and download the app from the respective store, the link to the store is included in the e-mail.
The e-mail contains another link with all user-specific login information. Users only need to retrieve this from the smartphone with the app installed and log in with their password.
The password corresponds to that of the UCServer user.
Autonomous user login
Users can also log in via the app's login.
Download app
Download app from the respective store
Name: ProCall Mobile
Enter login data
Fill in the following input fields
- Username
- Password
- Switch on UCConnect
- Enter UCServer ID or alias of the server account in question.
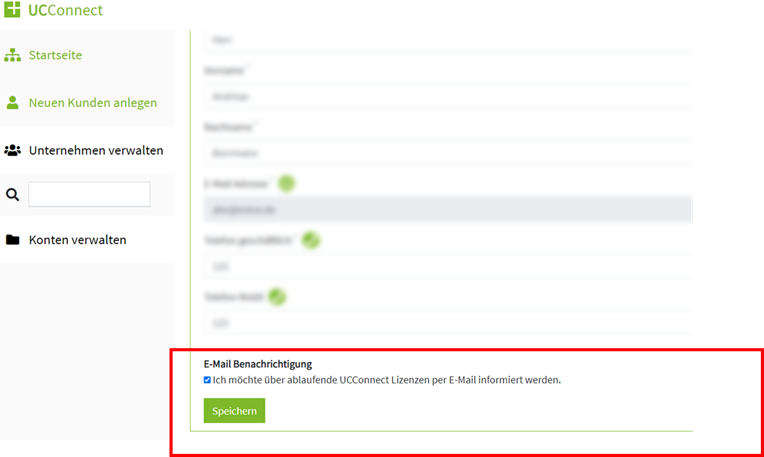
Notification service
When you create a UCConnect account, you can be automatically notified by e-mail about expiring licenses.
This service can also be activated later on an existing account.
Activate
Activate under (1) Manage account via the checkbox![]() at (2) E-mail notification.
at (2) E-mail notification.
Example screenshot: UCConnect e-mail notification
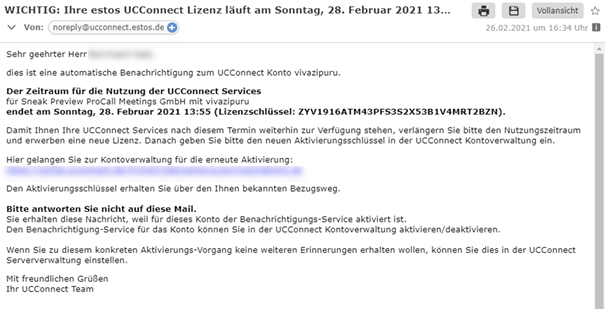
If e-mail notification is enabled, the customer account and, if applicable, the vendor account will be notified before the license expires:
- First notification four weeks before license expiration
- Second notification one week before the expiration of the license
- Third notification one day before the license expires
The e-mail informs the UCConnect user about the expiring license:
- Product
- License type
- Server account
- Expiration date
Example e-mail about the expiration of a UCConnect license
Deactivate
If the license is already renewed with another license or the service is no longer used, you can disable the notification service for this license:
To do this, select the desired license under Licenses → go to the menu and enable/disable the notification service.
Example screenshot: Select license and disable notification
